
| 일 | 월 | 화 | 수 | 목 | 금 | 토 |
|---|---|---|---|---|---|---|
| 1 | 2 | 3 | ||||
| 4 | 5 | 6 | 7 | 8 | 9 | 10 |
| 11 | 12 | 13 | 14 | 15 | 16 | 17 |
| 18 | 19 | 20 | 21 | 22 | 23 | 24 |
| 25 | 26 | 27 | 28 | 29 | 30 | 31 |
- modal
- TableView
- library
- ui
- Chrats
- Xcode
- ios
- UIButton
- 어플리케이션
- charts
- button
- PyQt
- Python
- PyQt5
- Chart
- Android
- kotlin
- alamofire
- androidstudio
- 그래프
- graph
- 라이브러리
- UIKit
- UITableView
- Swift
- 개발자
- Apple
- cocoapods
- Storyboard
- 개발
- Today
- Total
Jiwift
[iOS/Swift] FCM(Firebase Cloud Messaging) 키 등록 본문
2023.02.03 - [라이브러리/FCM] - [iOS/Swift] FCM(Firebase Cloud Messaging) - Xcode, 구글 콘솔 프로젝트 연동하기
2023.02.04 - [라이브러리/FCM] - [iOS/Swift] FCM(Firebase Cloud Messaging) - 키 등록
2023.02.04 - [라이브러리/FCM] - [iOS/Swift] FCM(Firebase Cloud Messaging) - 메세지 전송

키 등록을 위해서 애플 디벨롭 센터로 이동하고 Keys를 눌러주세요.
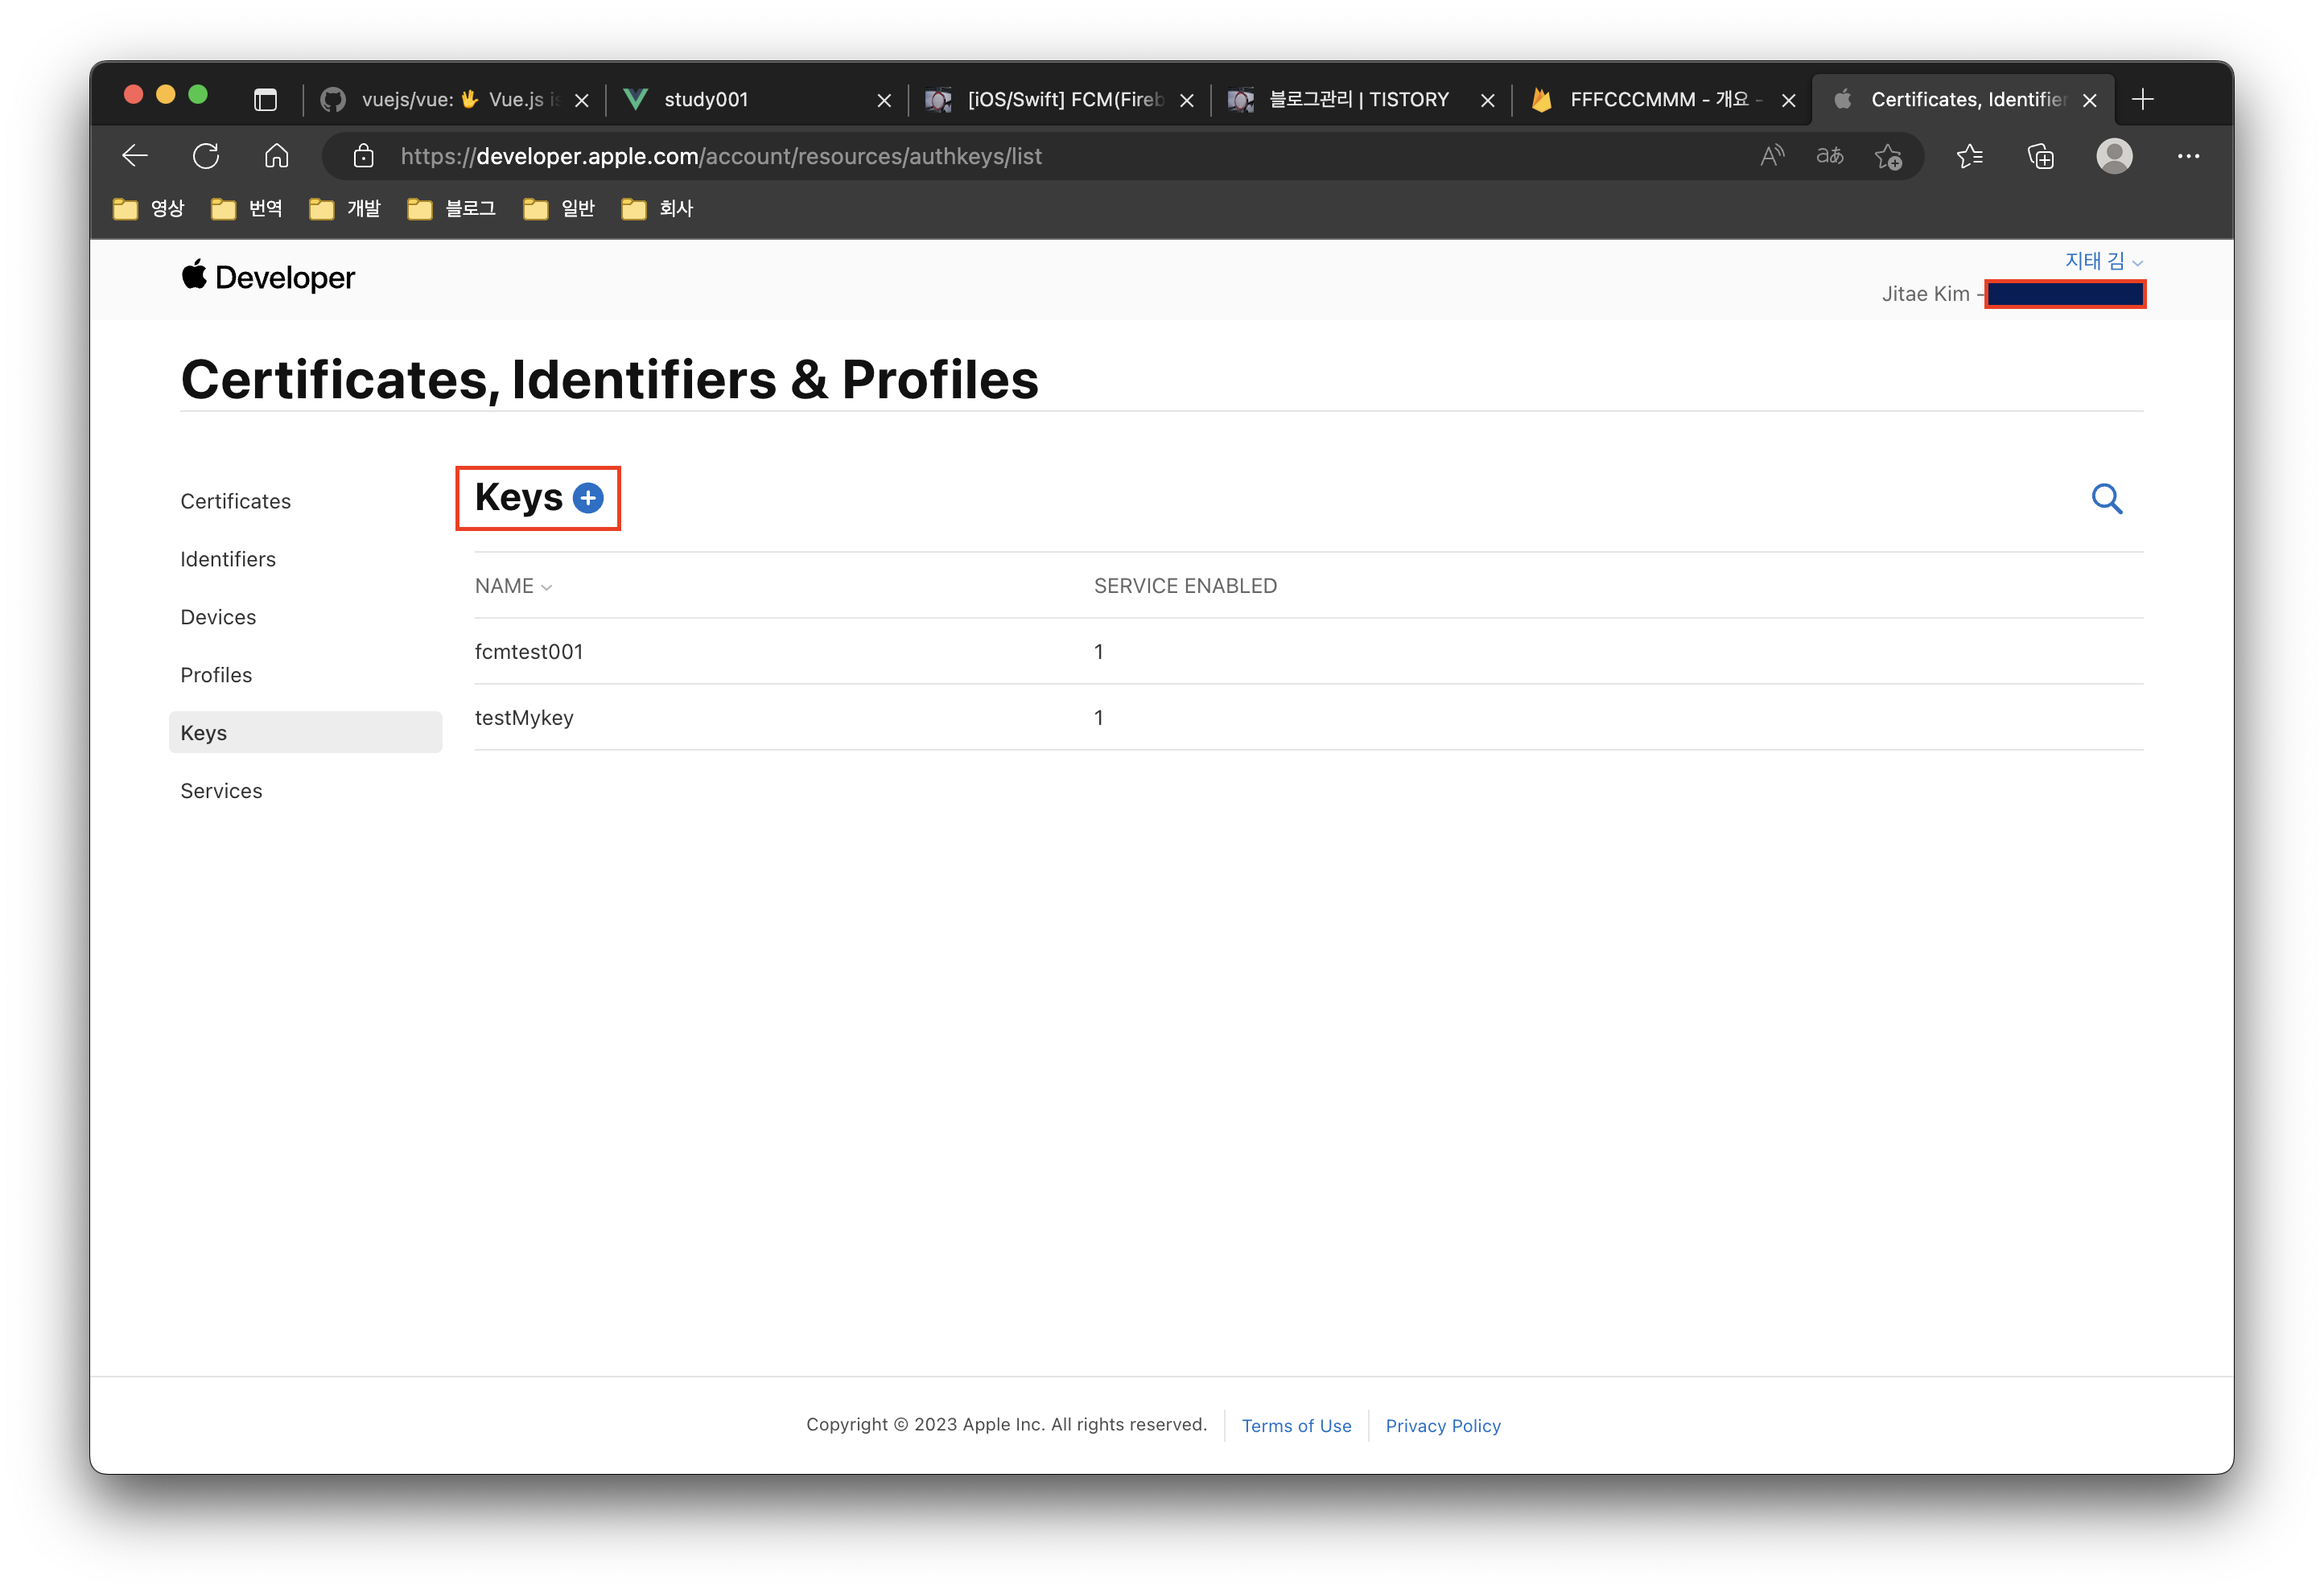
더하기 버튼을 눌러서 추가 절차를 진행합니다.
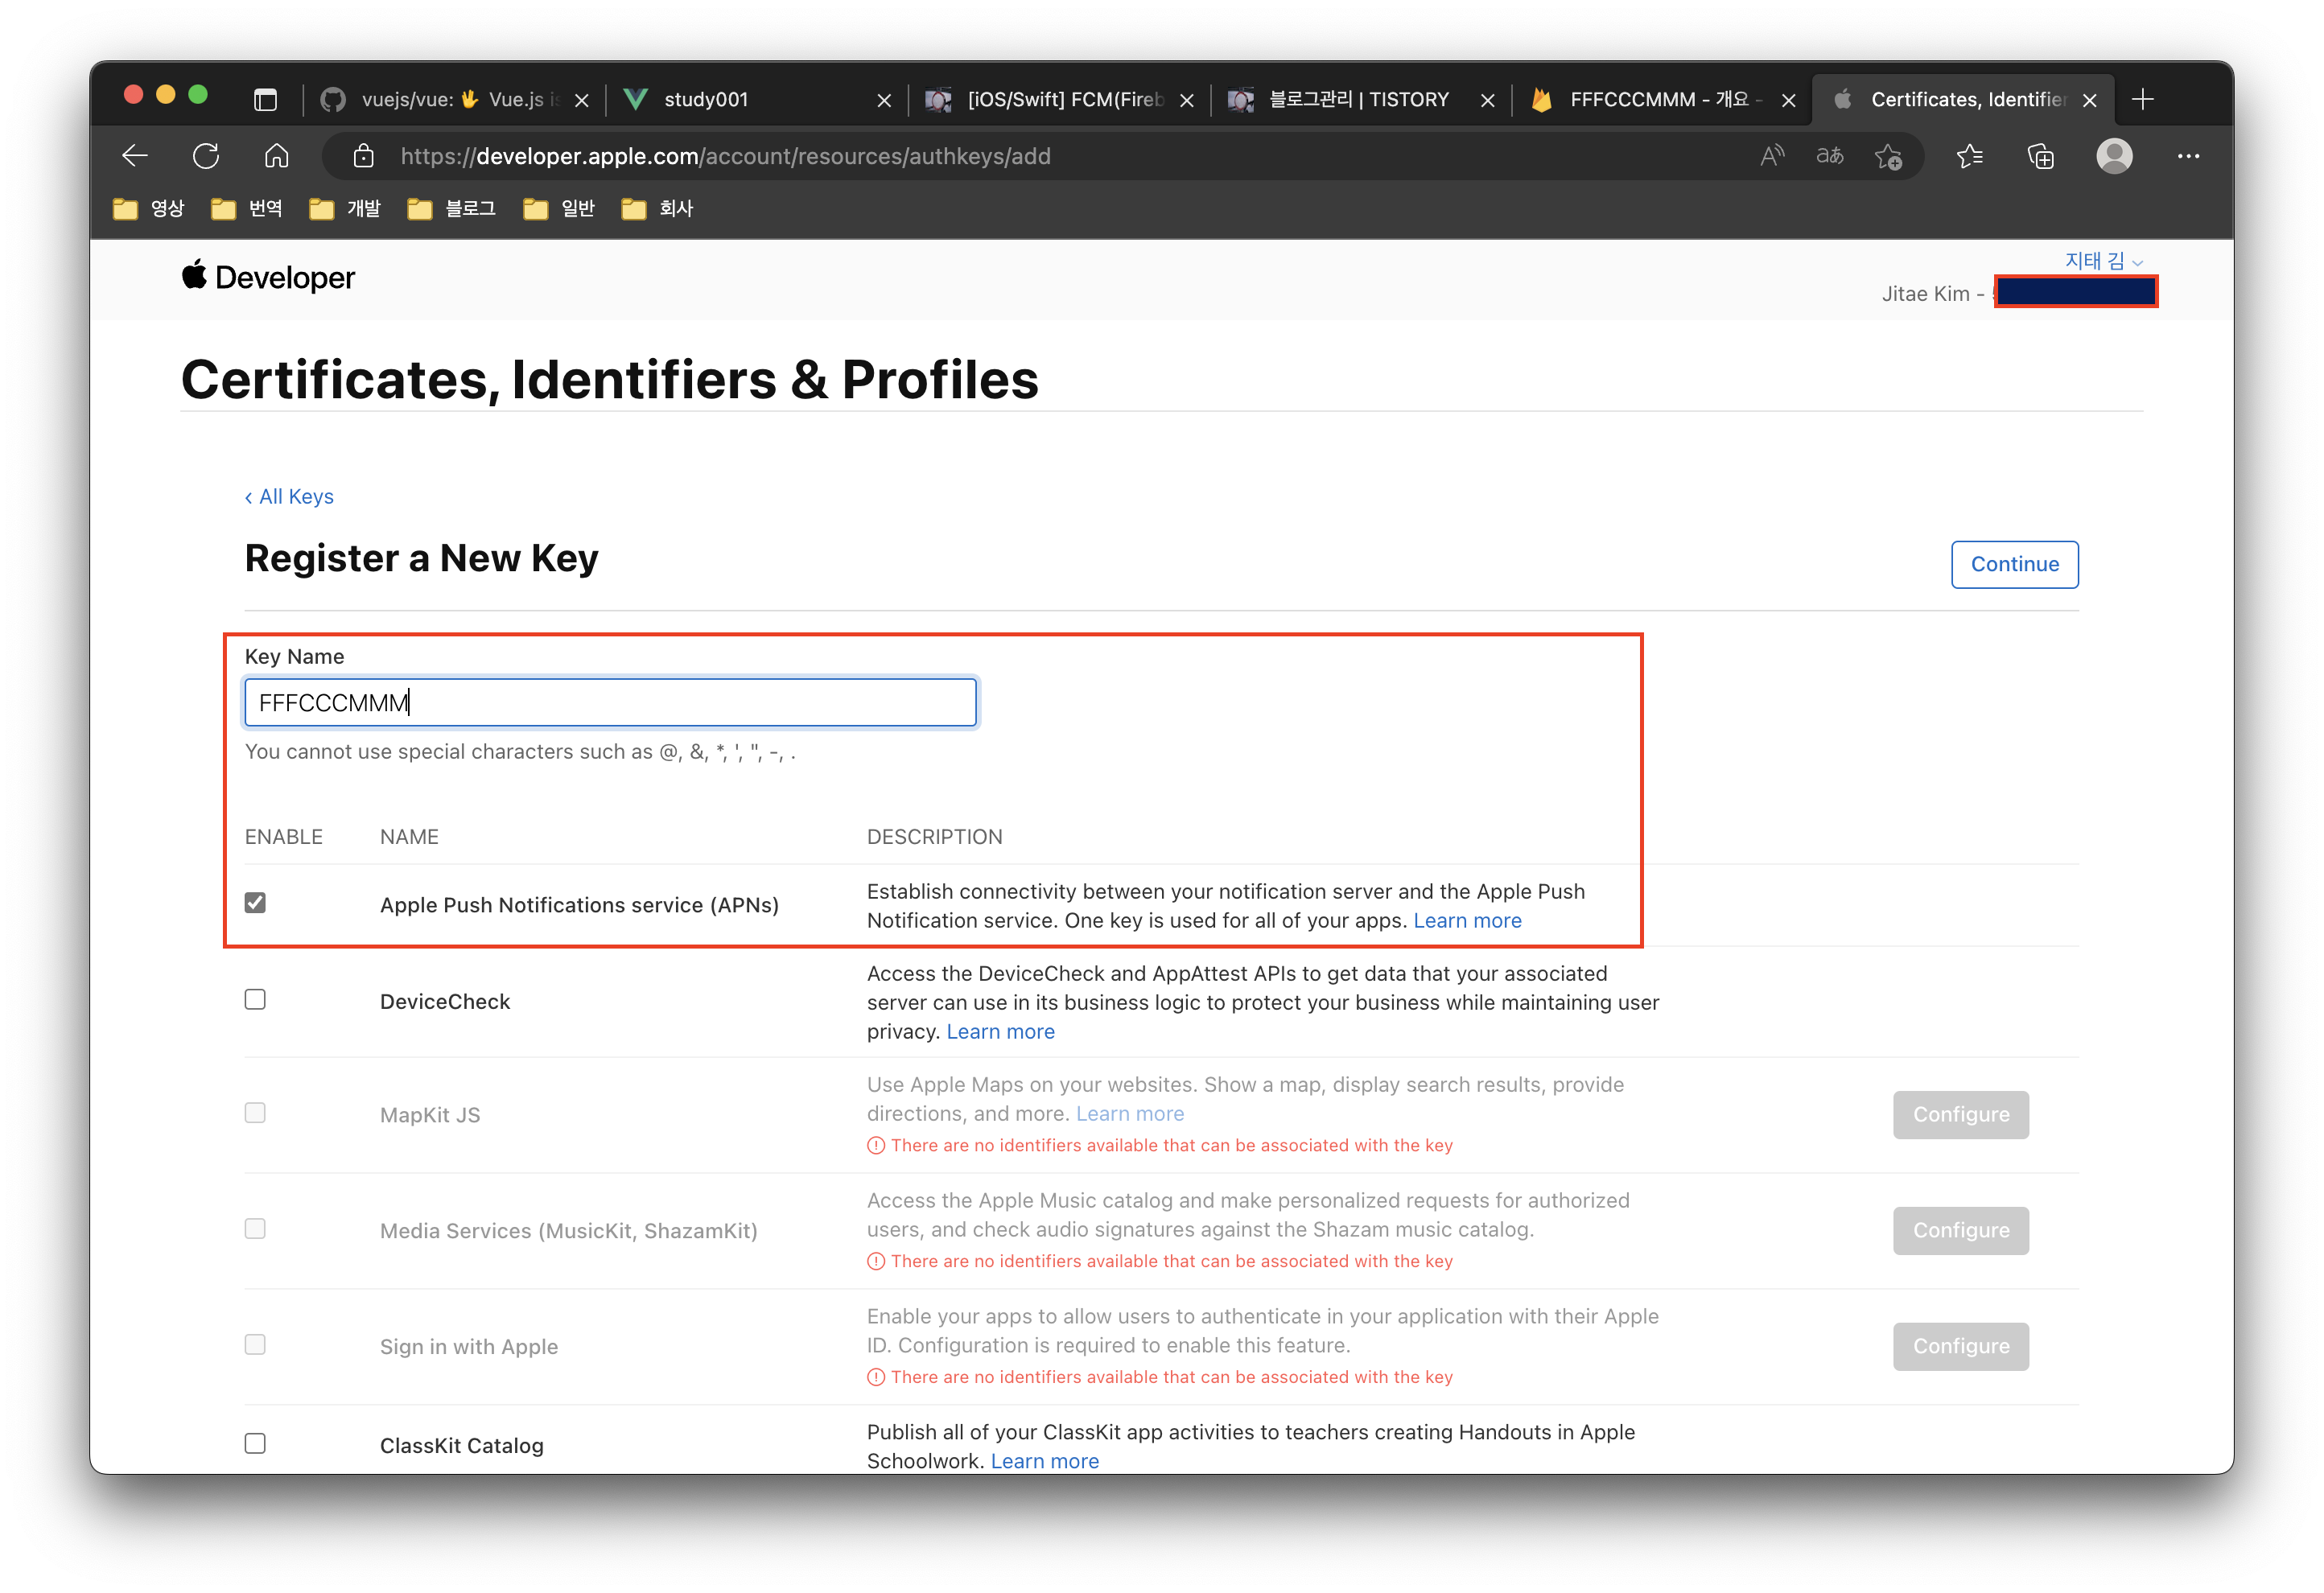
Key Name은 원하는 이름을 입력합니다. 저는 앱 프로젝트와 같은 이름을 선택하였고, 아래 Key 권한에서 Apple Push Notification Service를 선택합니다. 그리고 Continue를 눌러 다음으로 넘어갑니다.
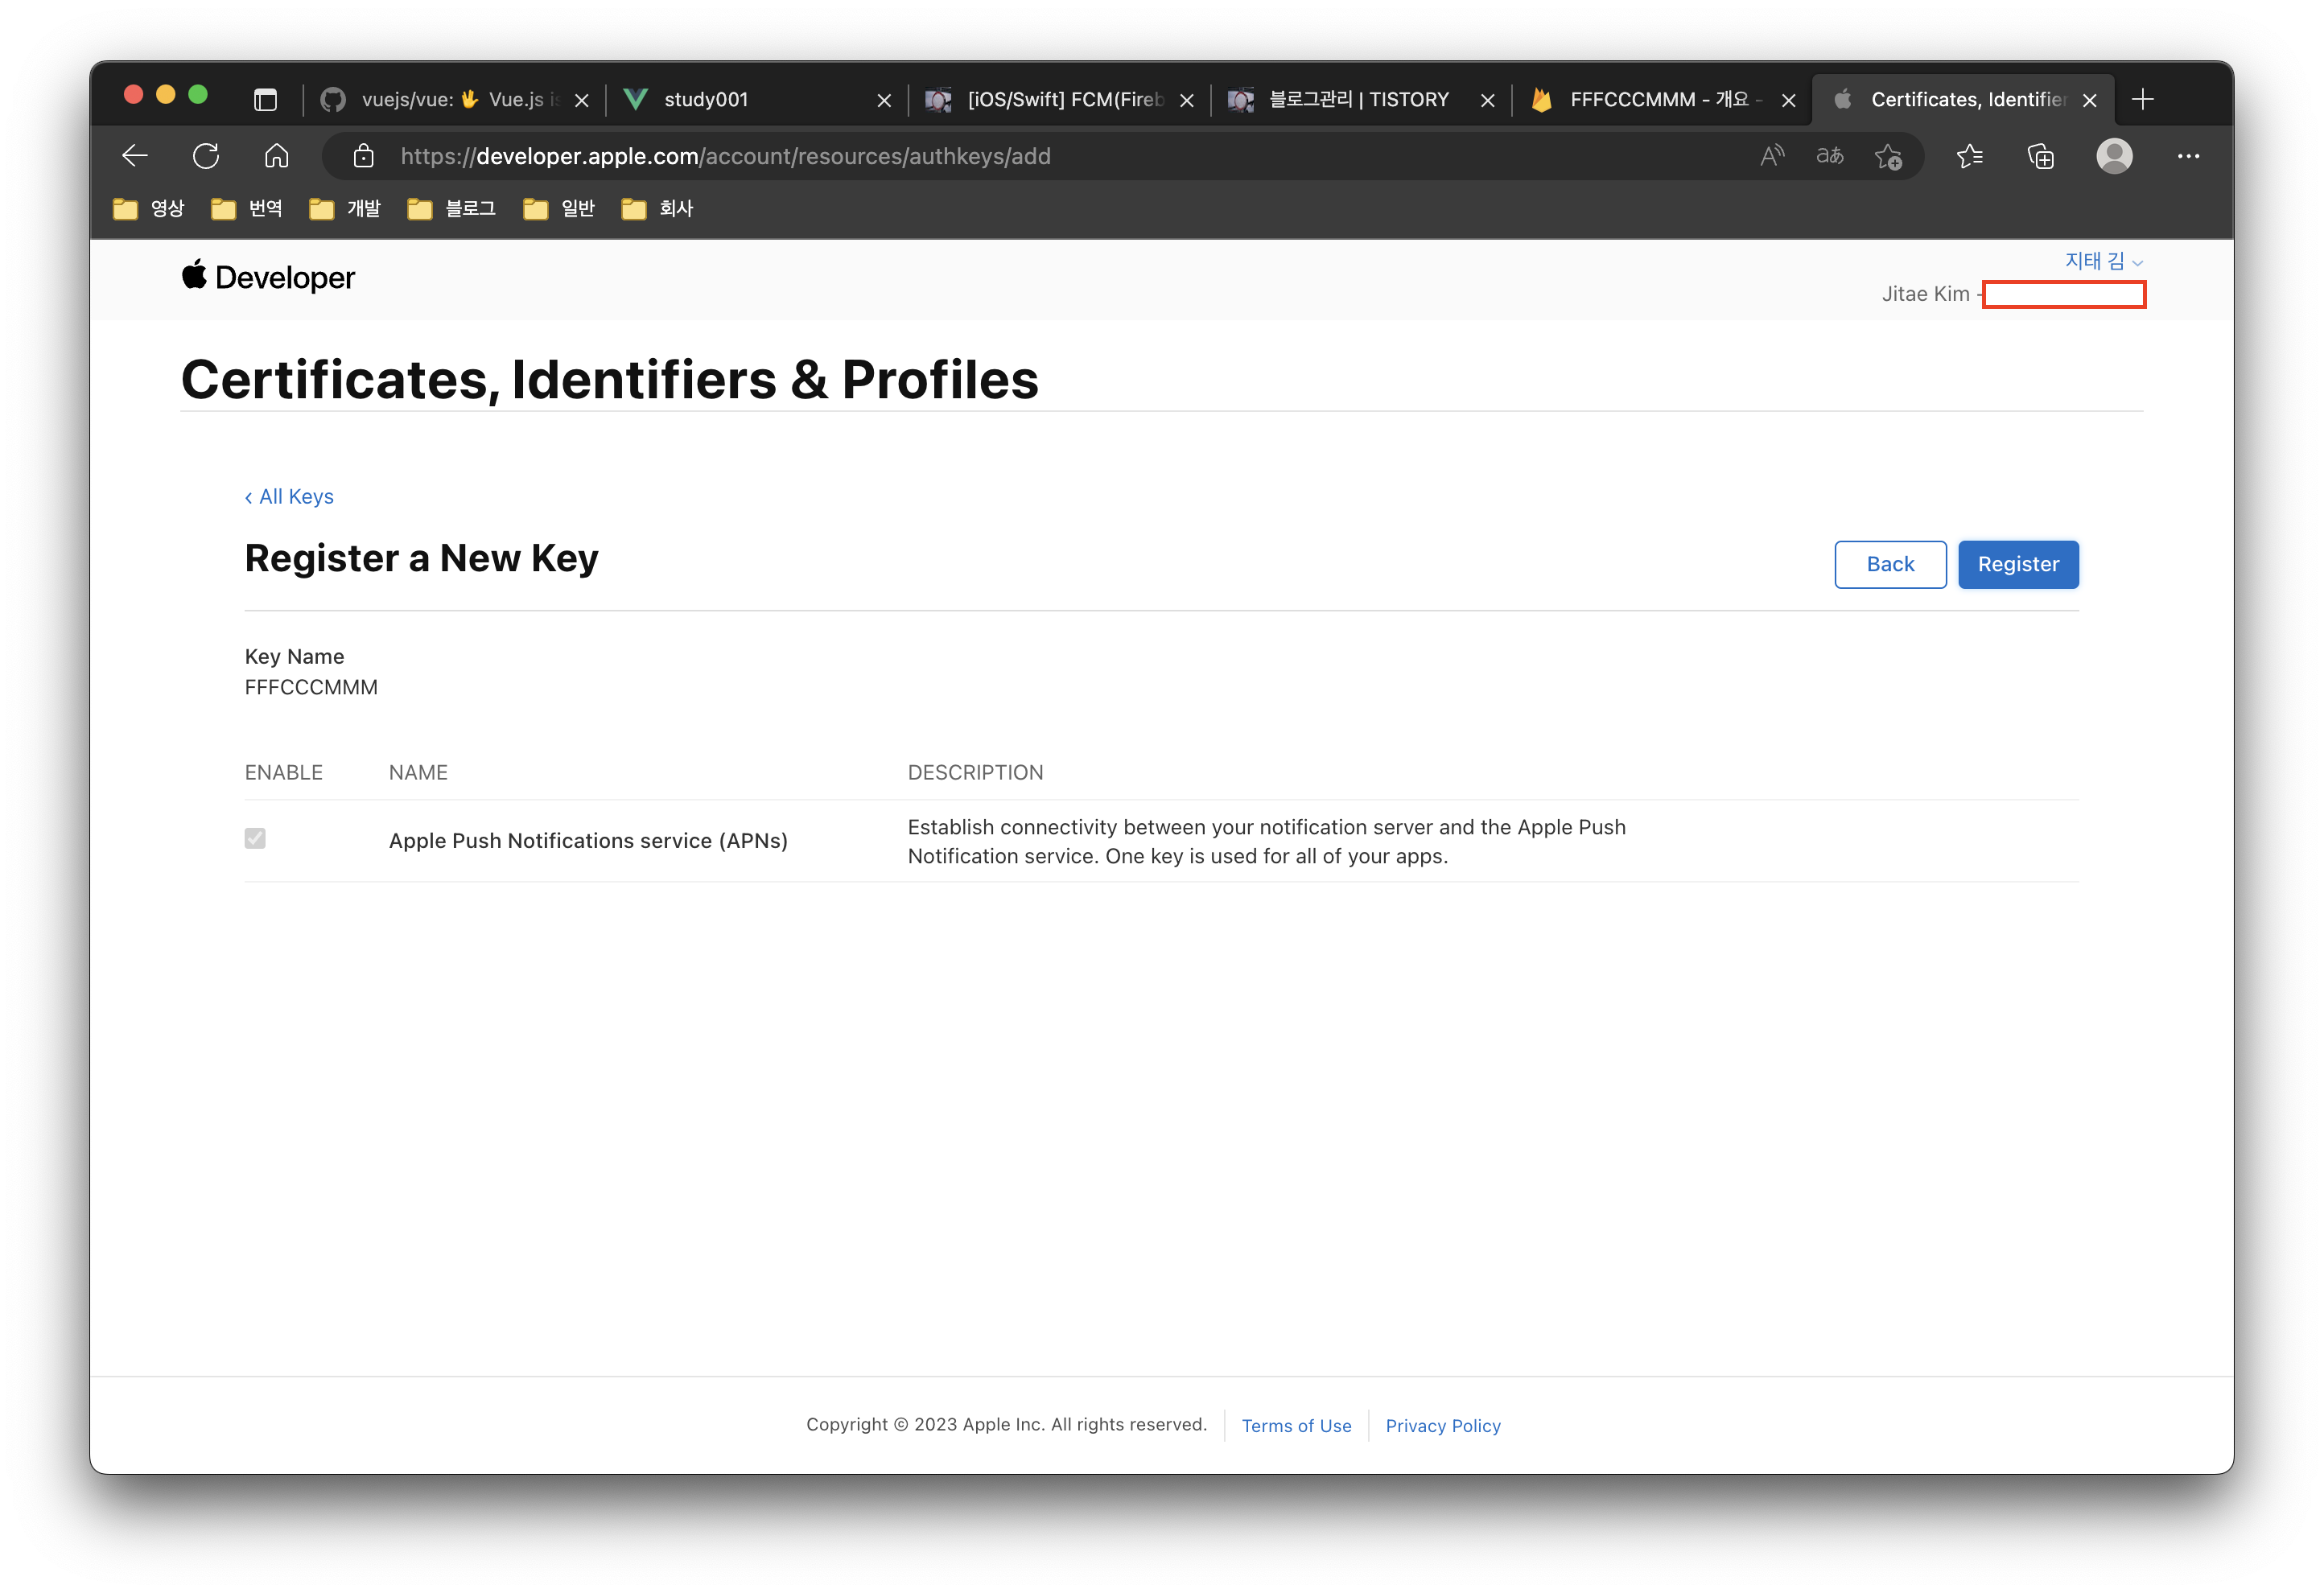
선택 내용을 확인하고 Register를 선택합니다.
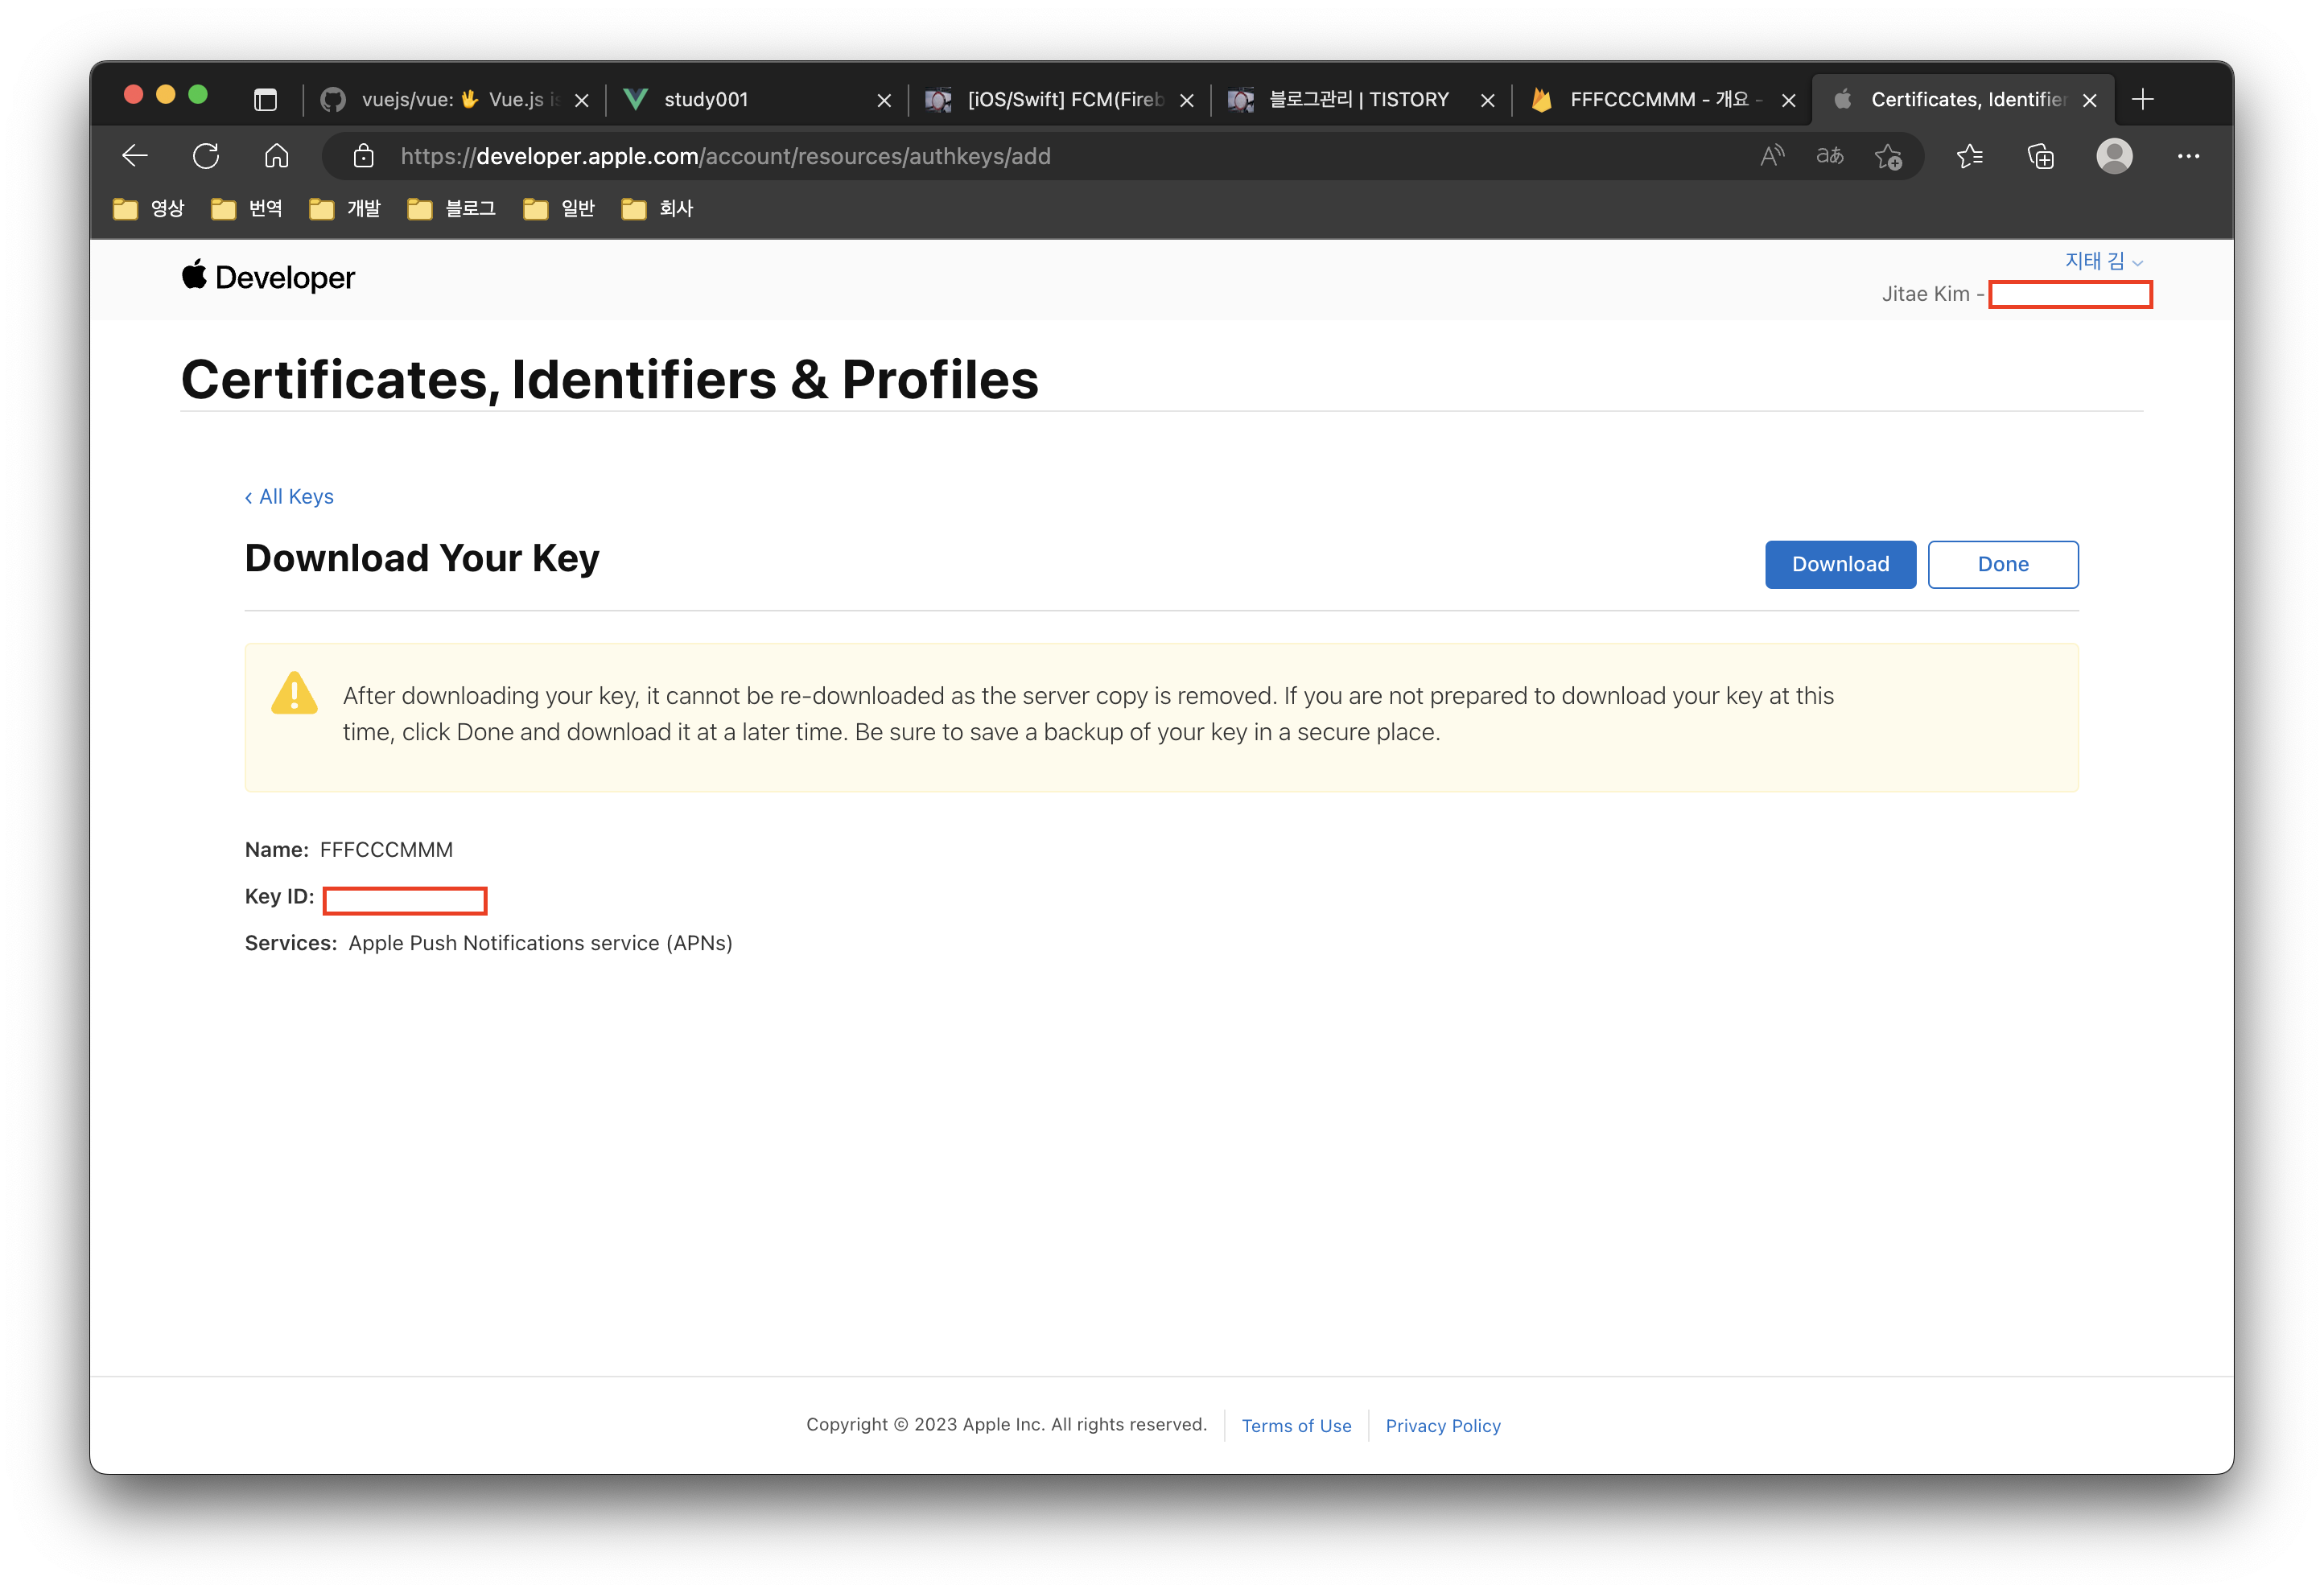
Key 발급이 완료되었습니다. 여기서 중요한 점은 Key를 다운로드하고 나면 재 다운로드가 불가능해서 다시 신청해야 한다는 겁니다. 그러기 때문에 키 관리를 제대로 해주세요.
1. Download 버튼을 눌러서 키를 저장합니다.
2. Key ID를 기억하고 있어야 합니다.
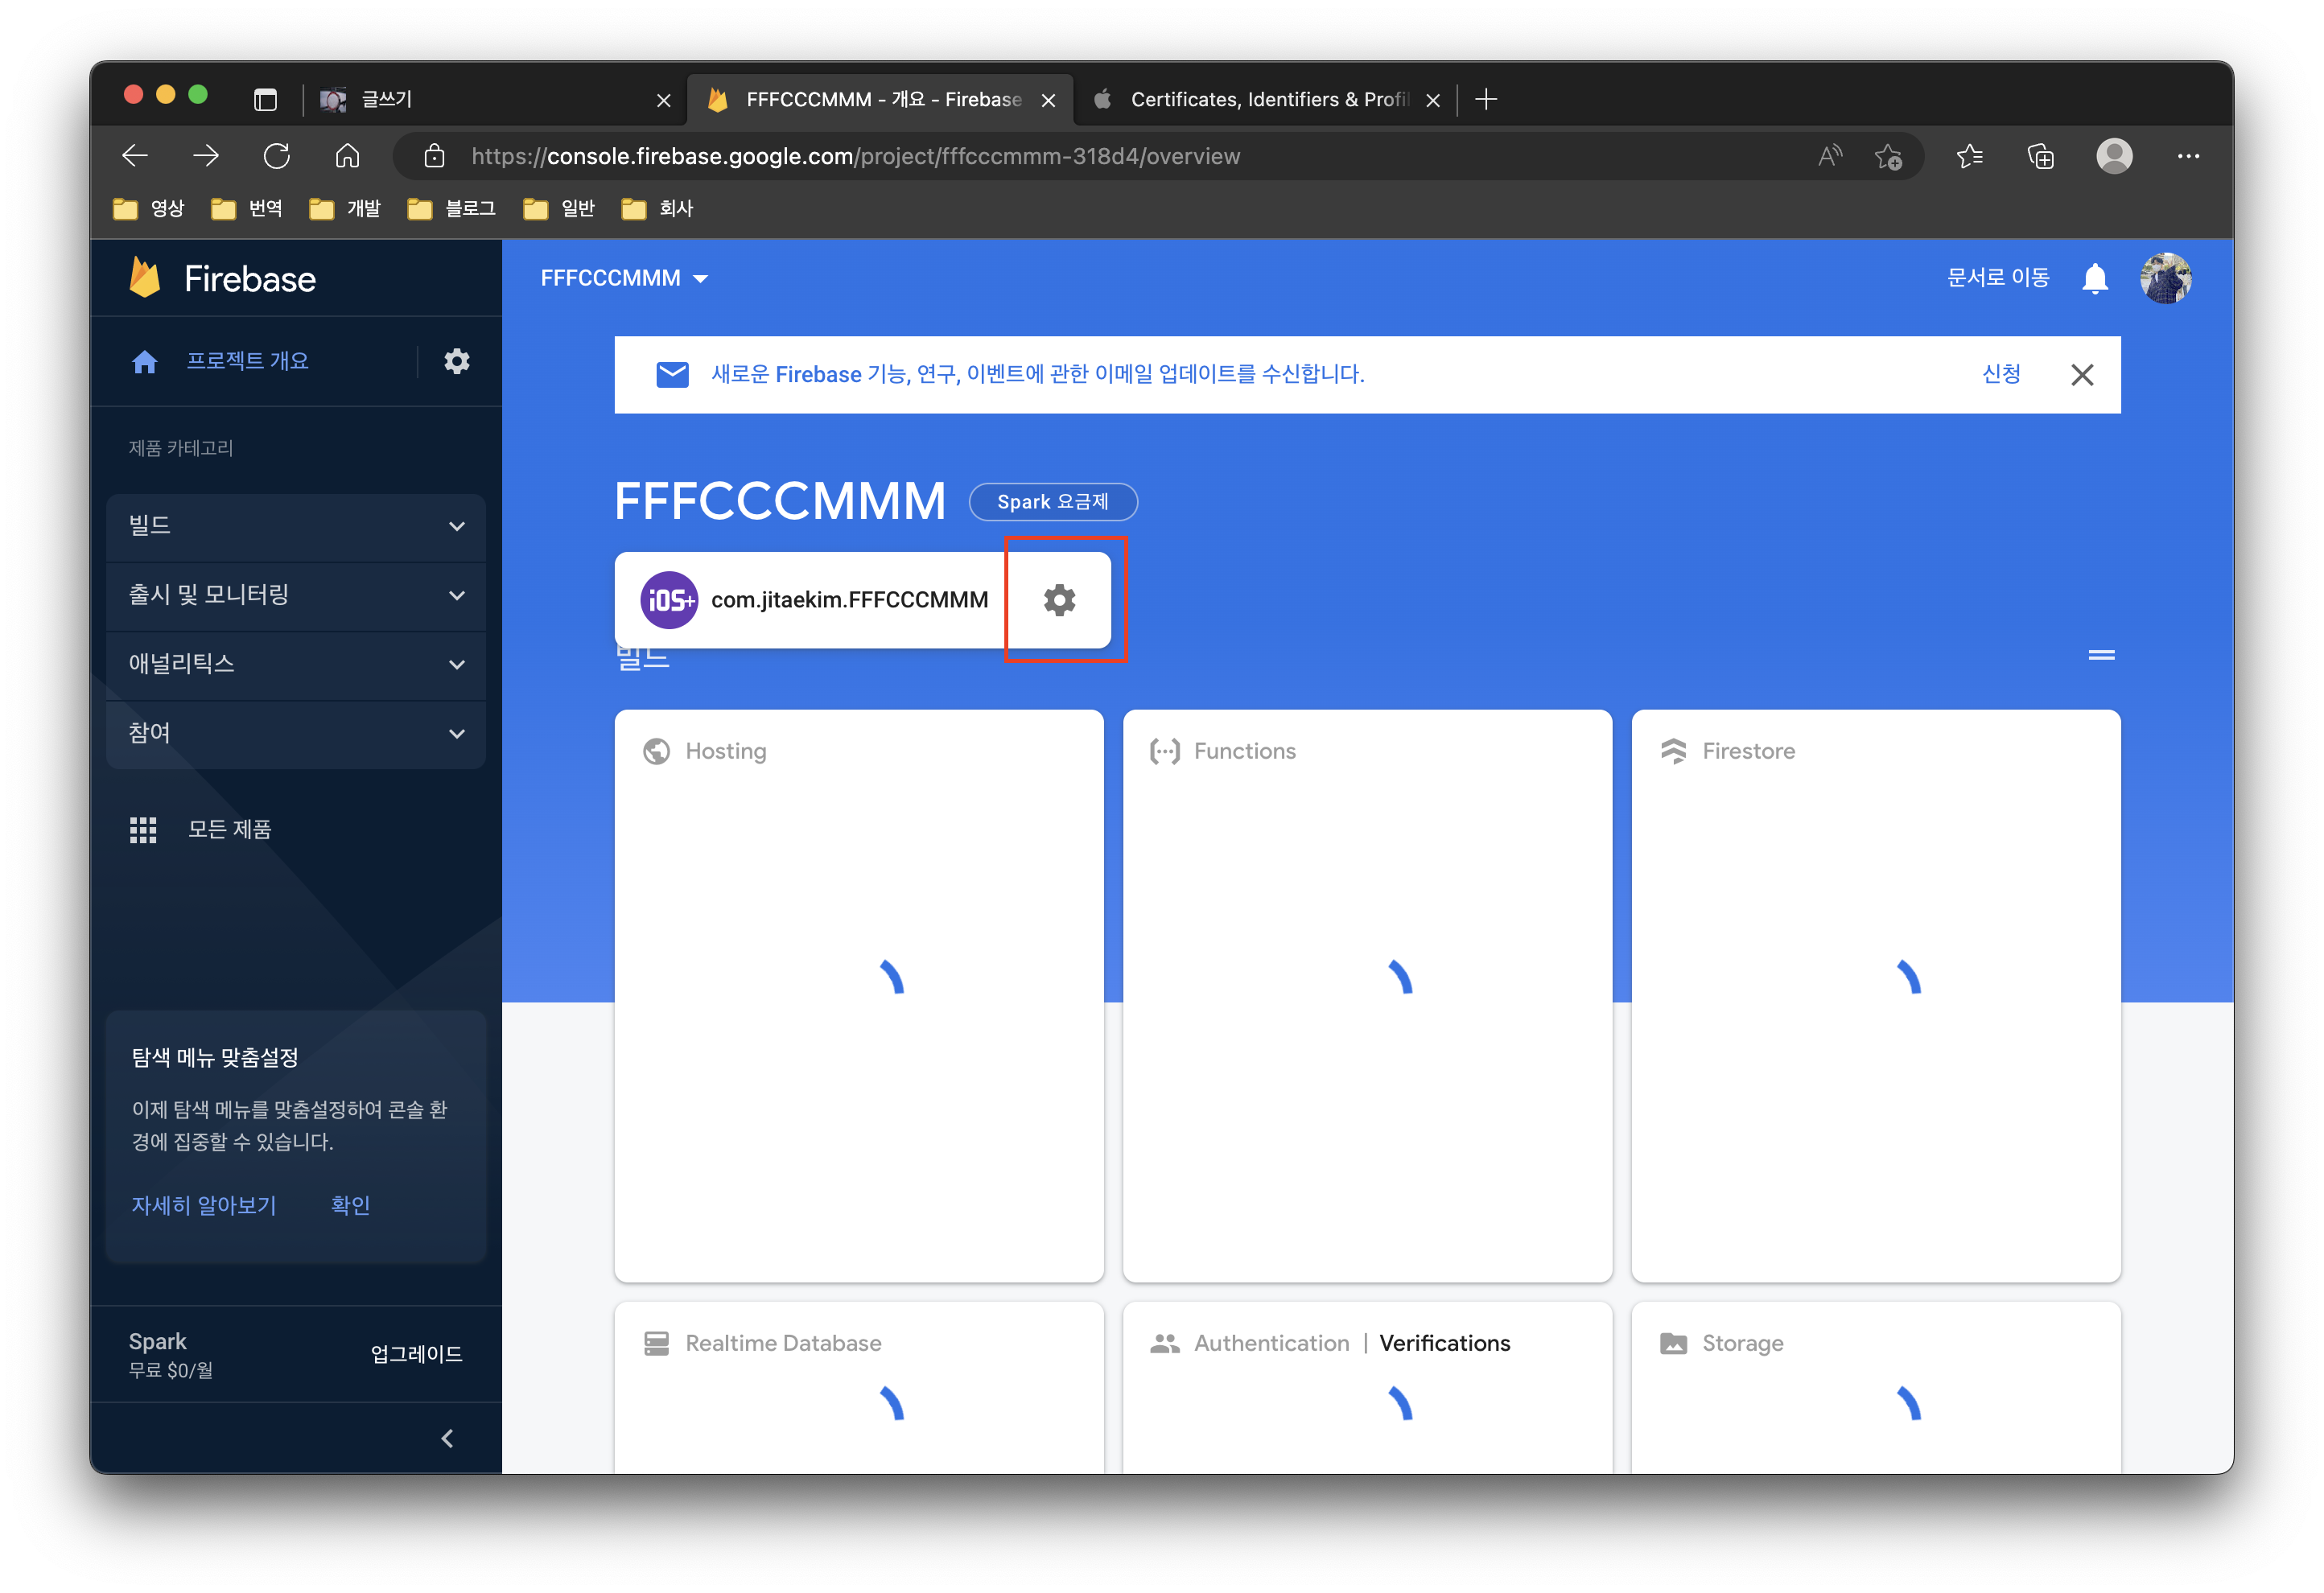
이제 콘솔 화면으로 돌아와서 iOS 프로젝트 설정을 눌러줍니다.

설정을 들어오면 메뉴에 '클라우드 메시징'이 있습니다. 선택해서 들어가 줍니다.
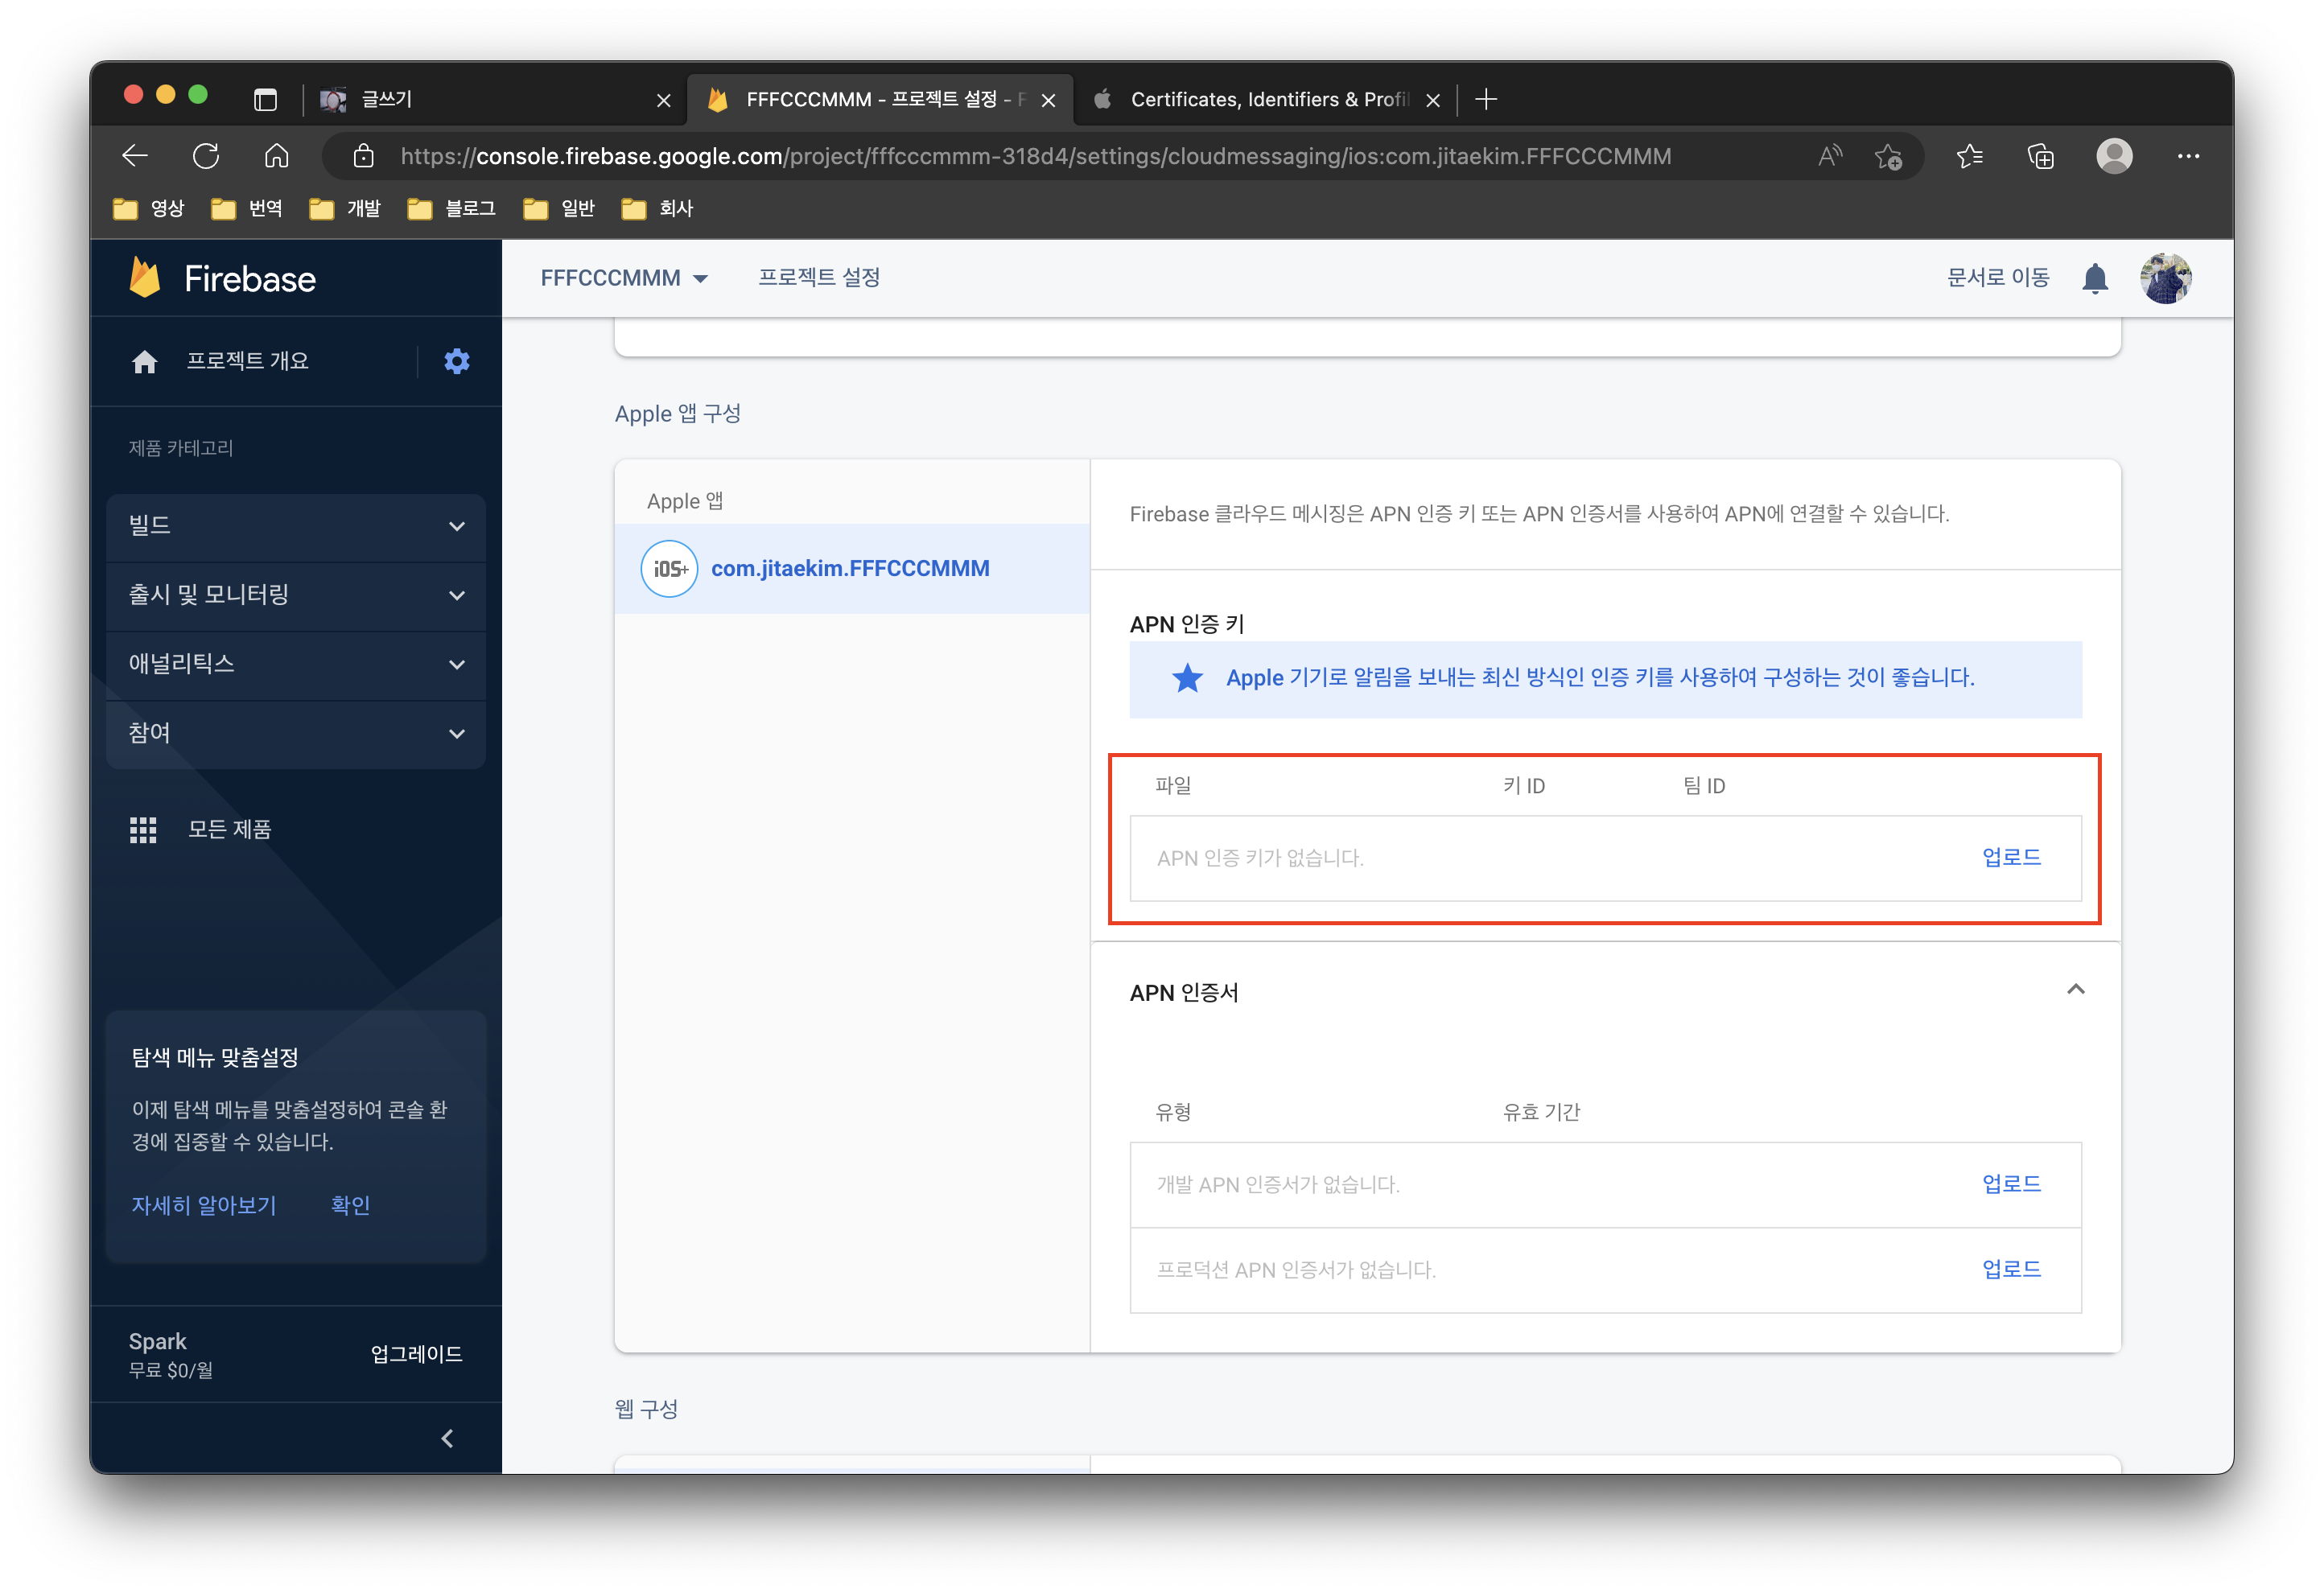
들어오면 중간에 APN 인증 키 등록하는 공간이 보입니다. 여기서 업로드 버튼을 눌러 등록을 진행합니다.
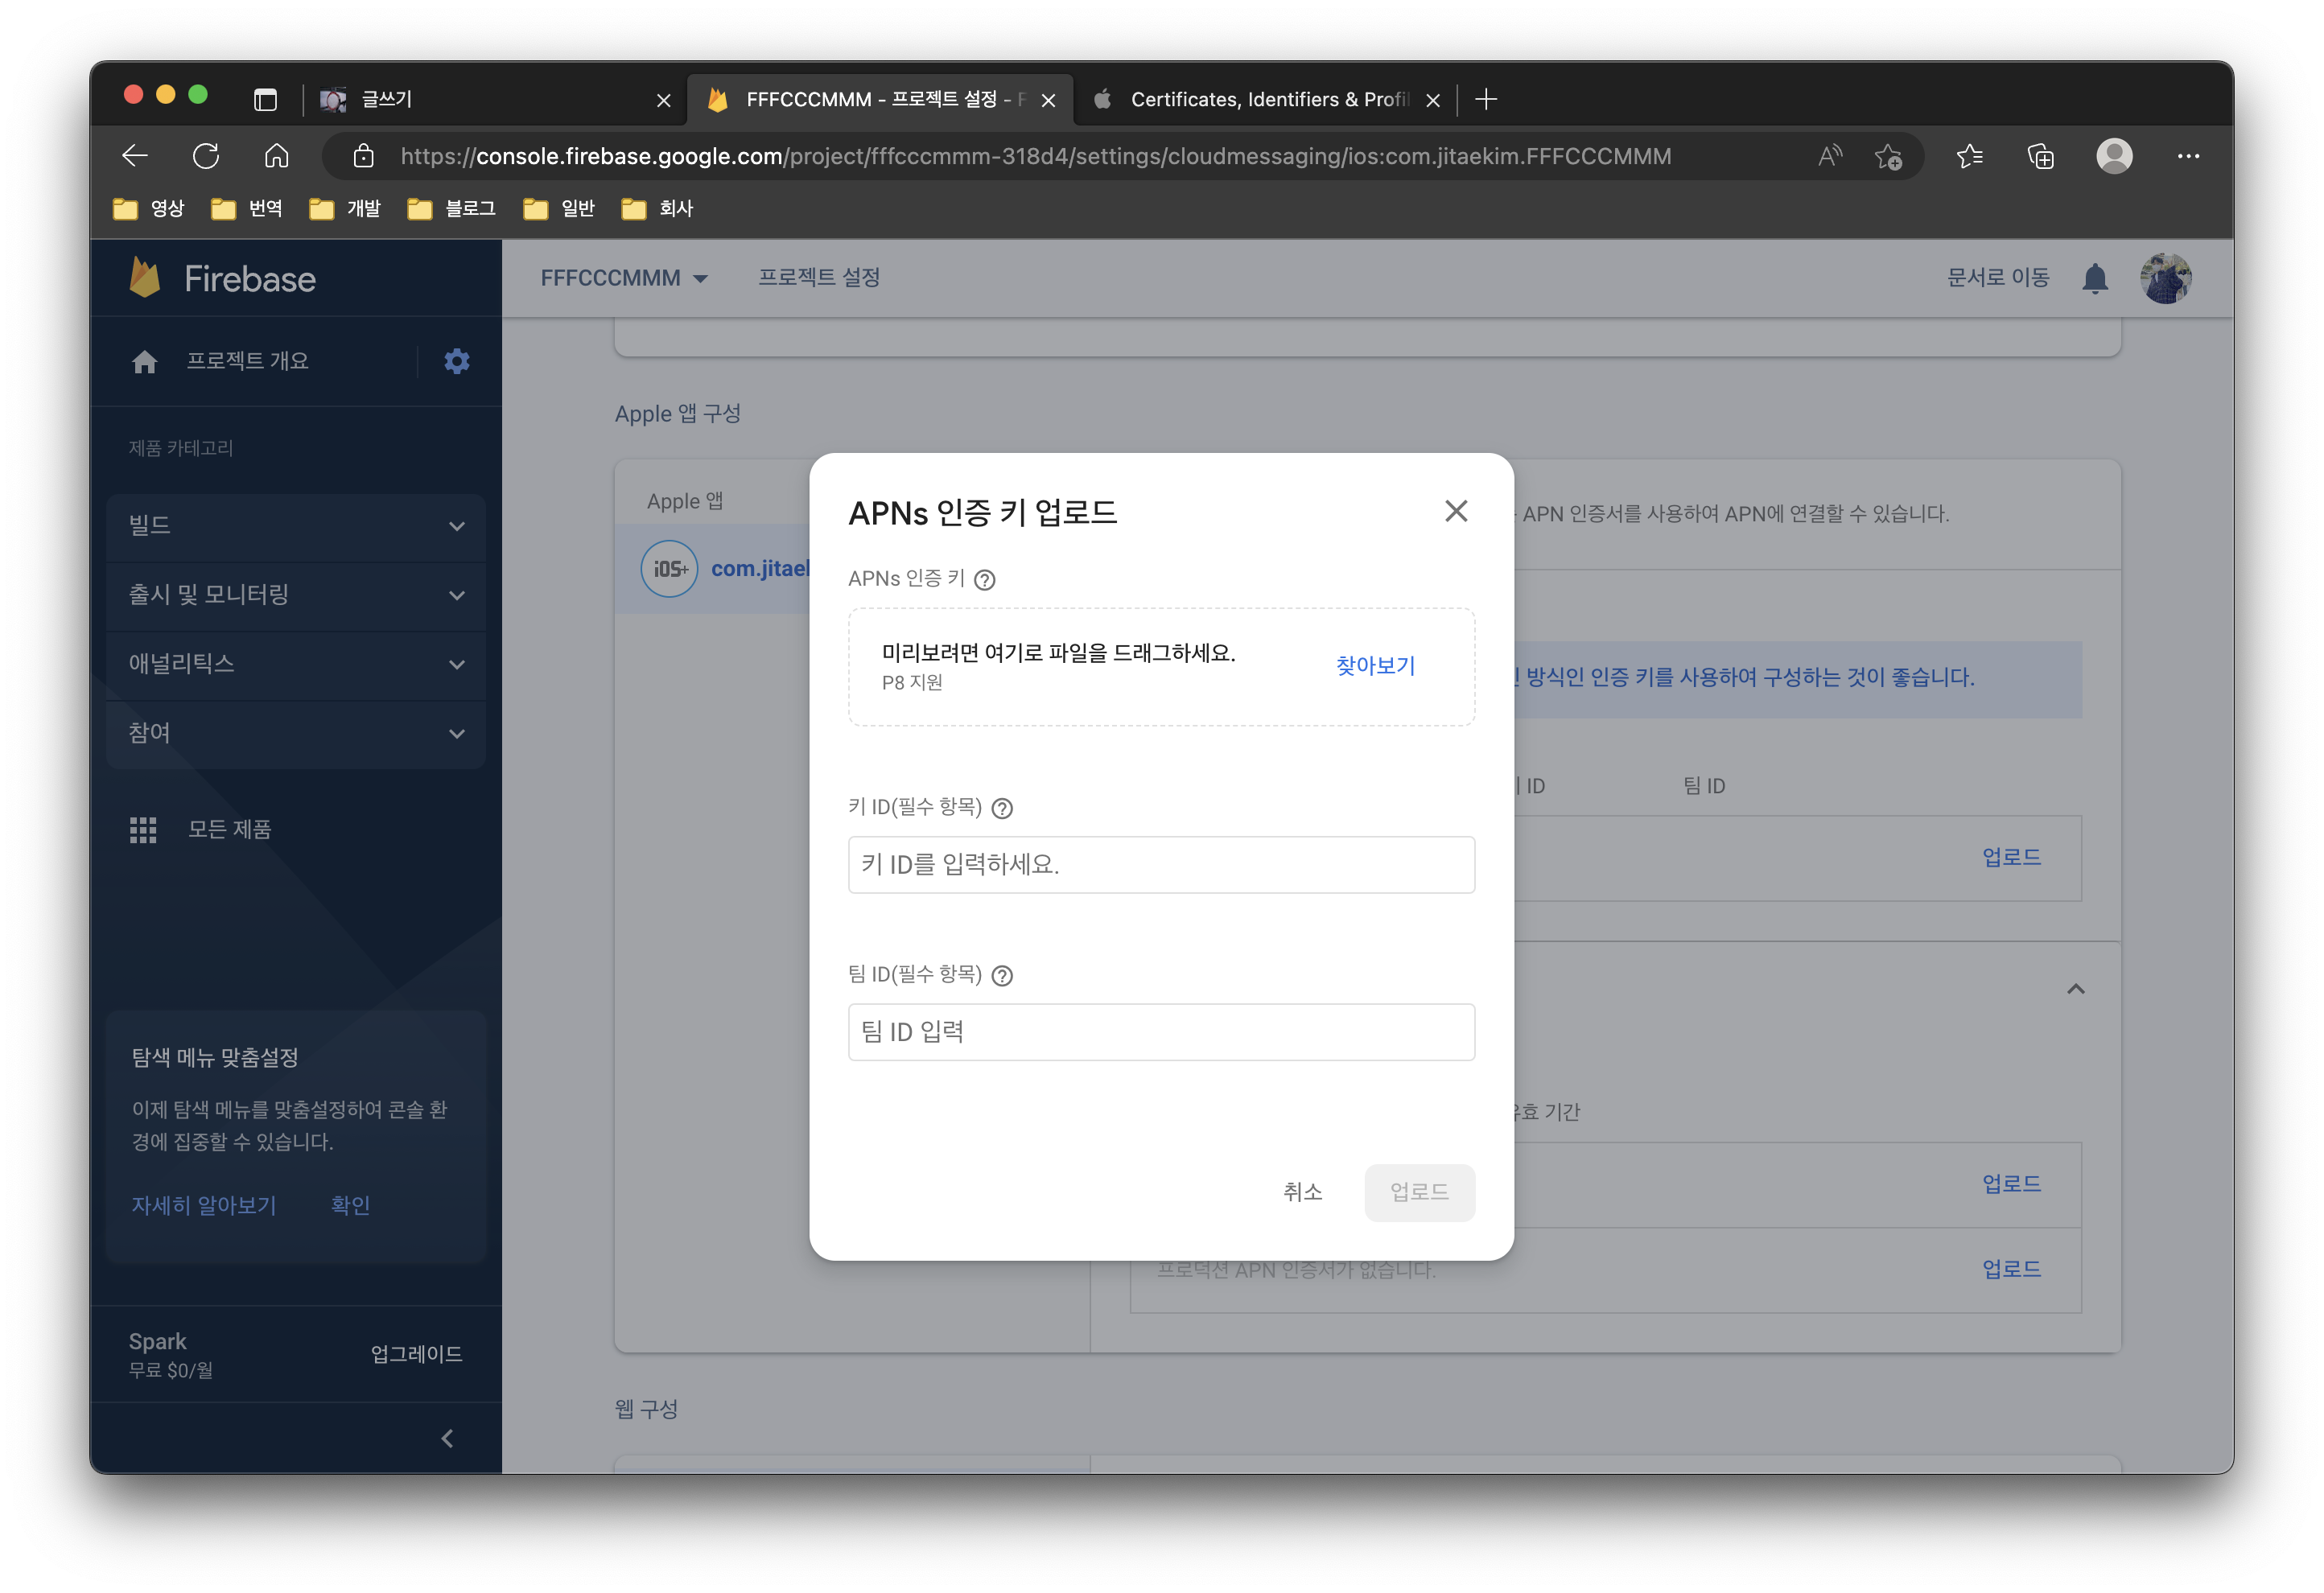
위에서 다운로드한 키를 등록하고 키 ID를 입력합니다. 팀 ID는 애플 개발자 계정에 같이 보이는 ID입니다.
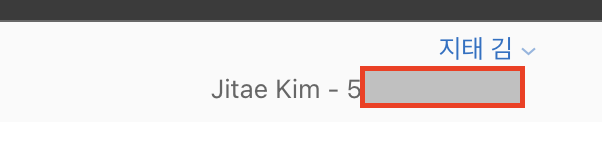
우측 상단에 보면 키 ID와 비슷하게 생긴 팀 ID가 있습니다.

등록이 완료된 모습입니다.
이제는 코드를 입력합니다.
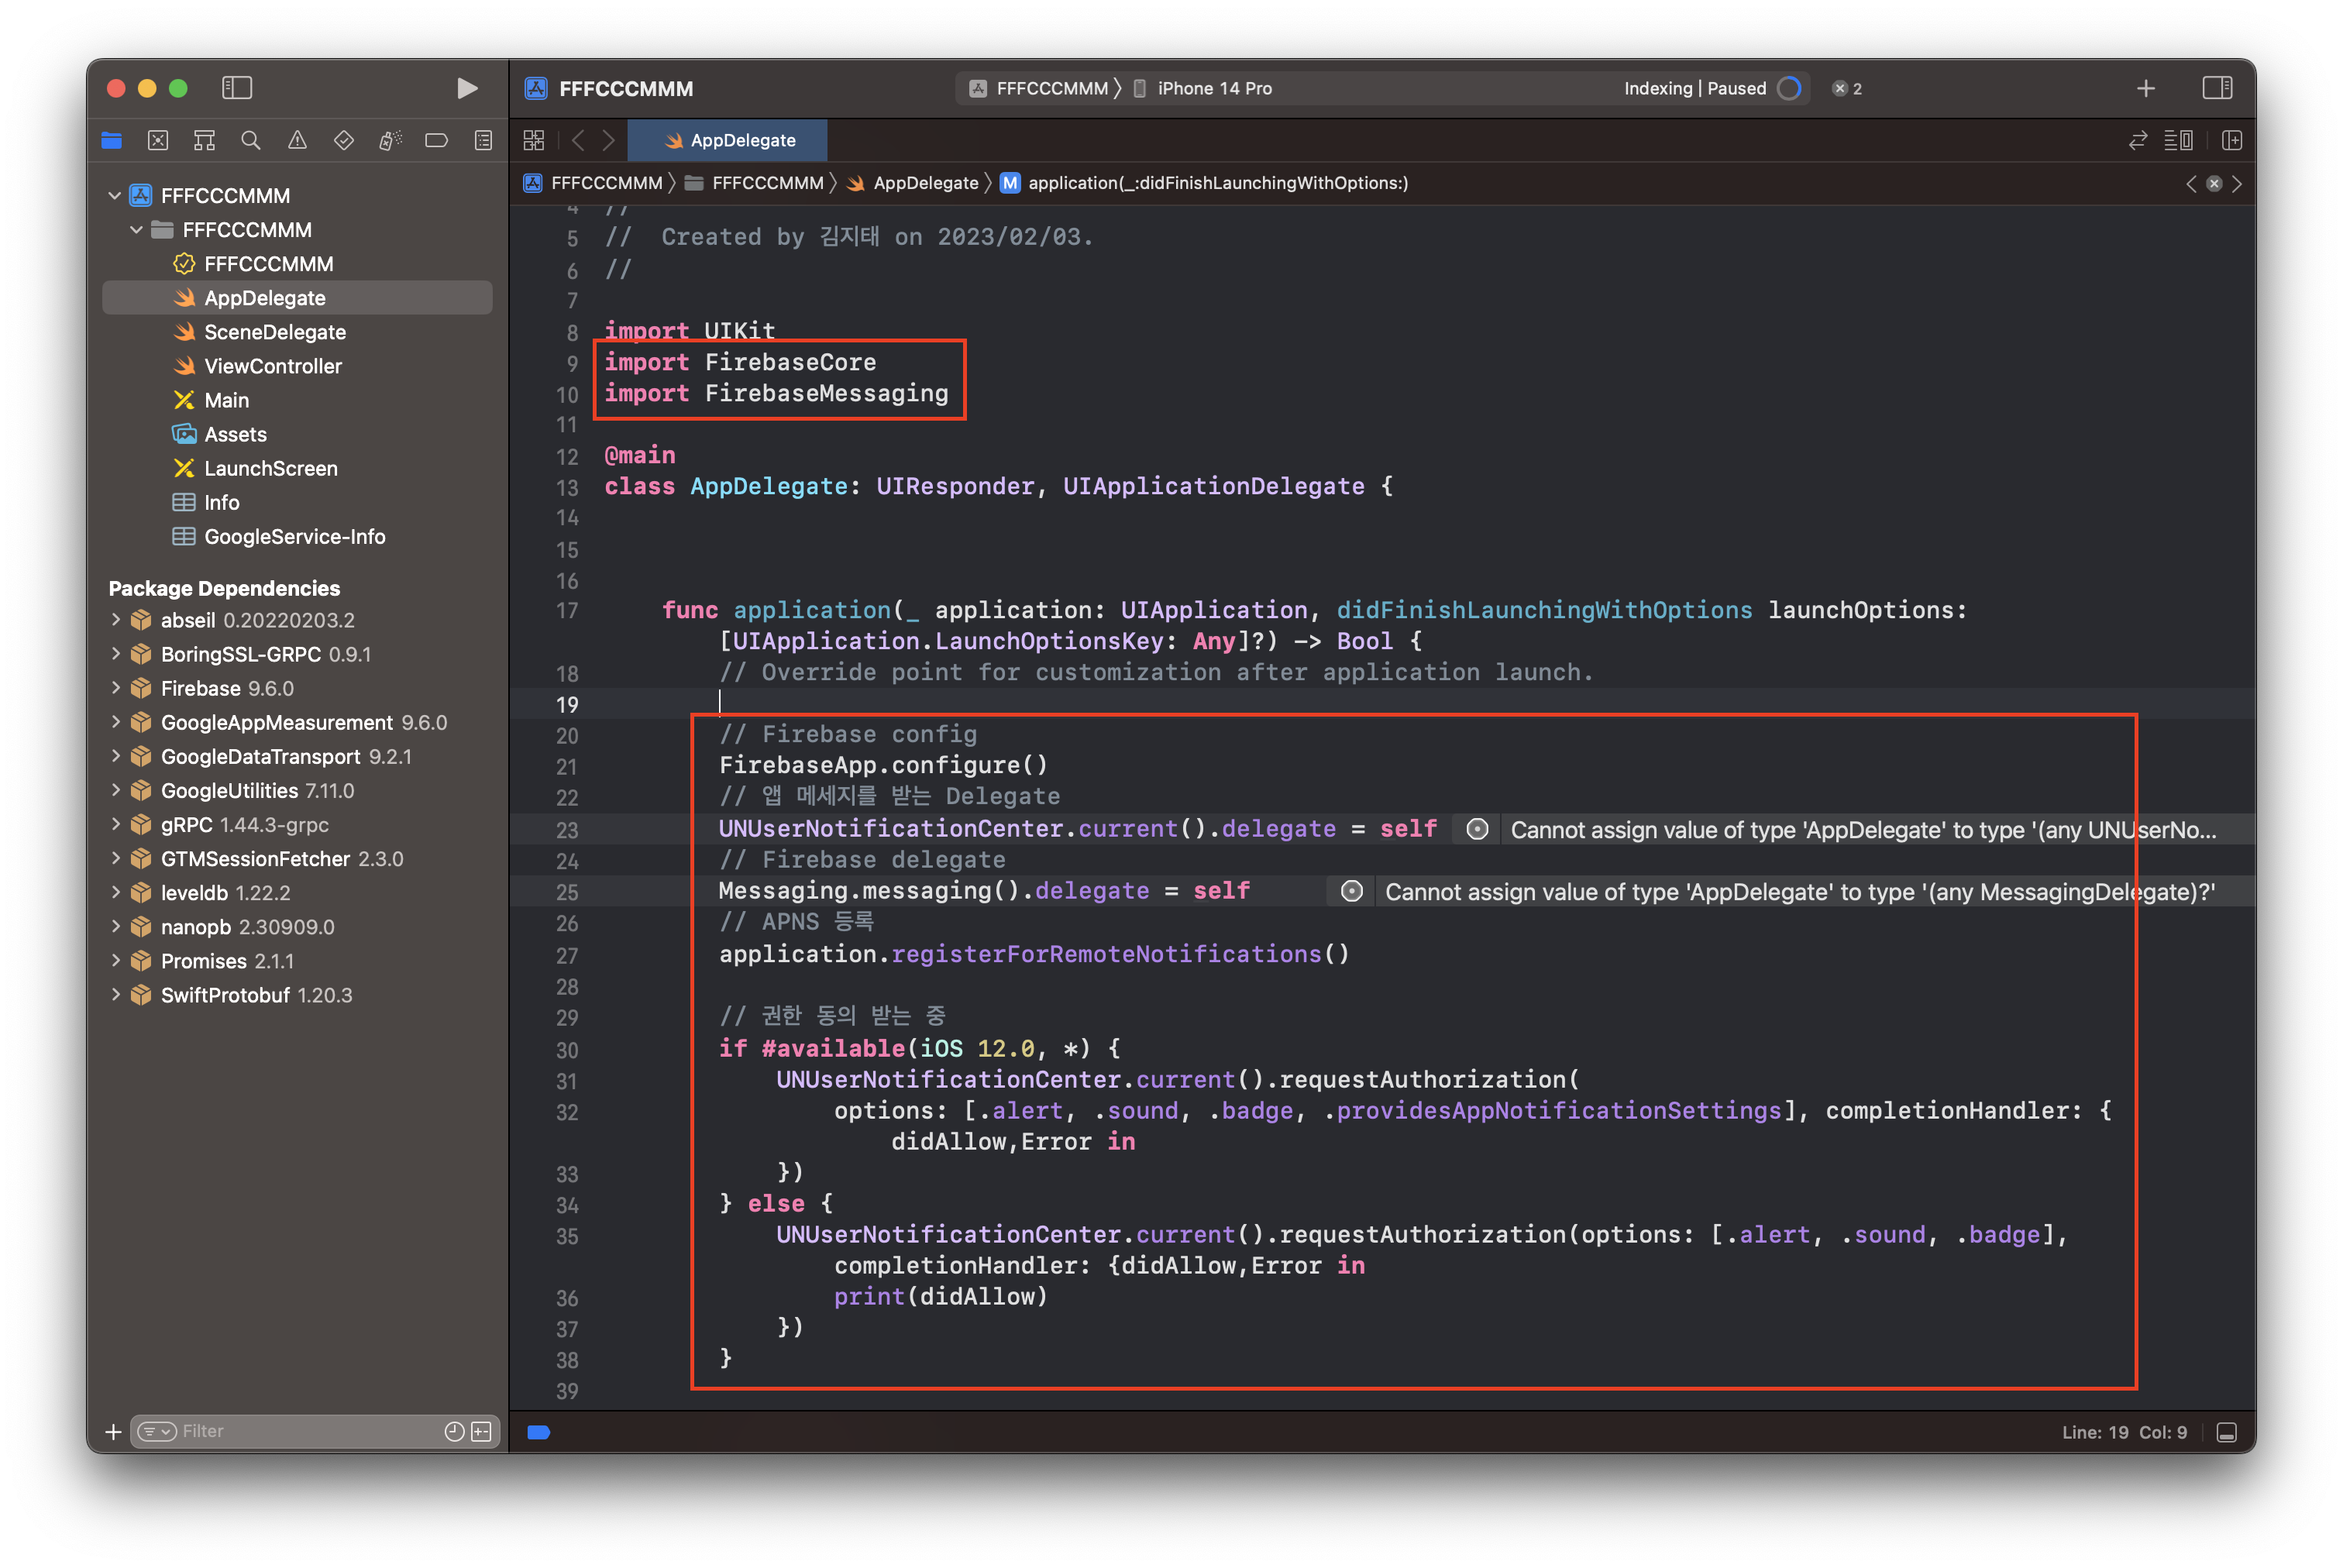
AppDelegate에 작성
import FirebaseCore
import FirebaseMessaging
import 내용
// Firebase config
FirebaseApp.configure()
// 앱 메세지를 받는 Delegate
UNUserNotificationCenter.current().delegate = self
// Firebase delegate
Messaging.messaging().delegate = self
// APNS 등록
application.registerForRemoteNotifications()

// 권한 동의 받는 중
if #available(iOS 12.0, *) {
    UNUserNotificationCenter.current().requestAuthorization(
    options: [.alert, .sound, .badge, .providesAppNotificationSettings], completionHandler: { didAllow,Error in
   	print(didAllow)
    })
} else {
    UNUserNotificationCenter.current().requestAuthorization(options: [.alert, .sound, .badge], completionHandler: {didAllow,Error in
    	print(didAllow)
    })
}
didFinishLaunchingWithOptions에 입력
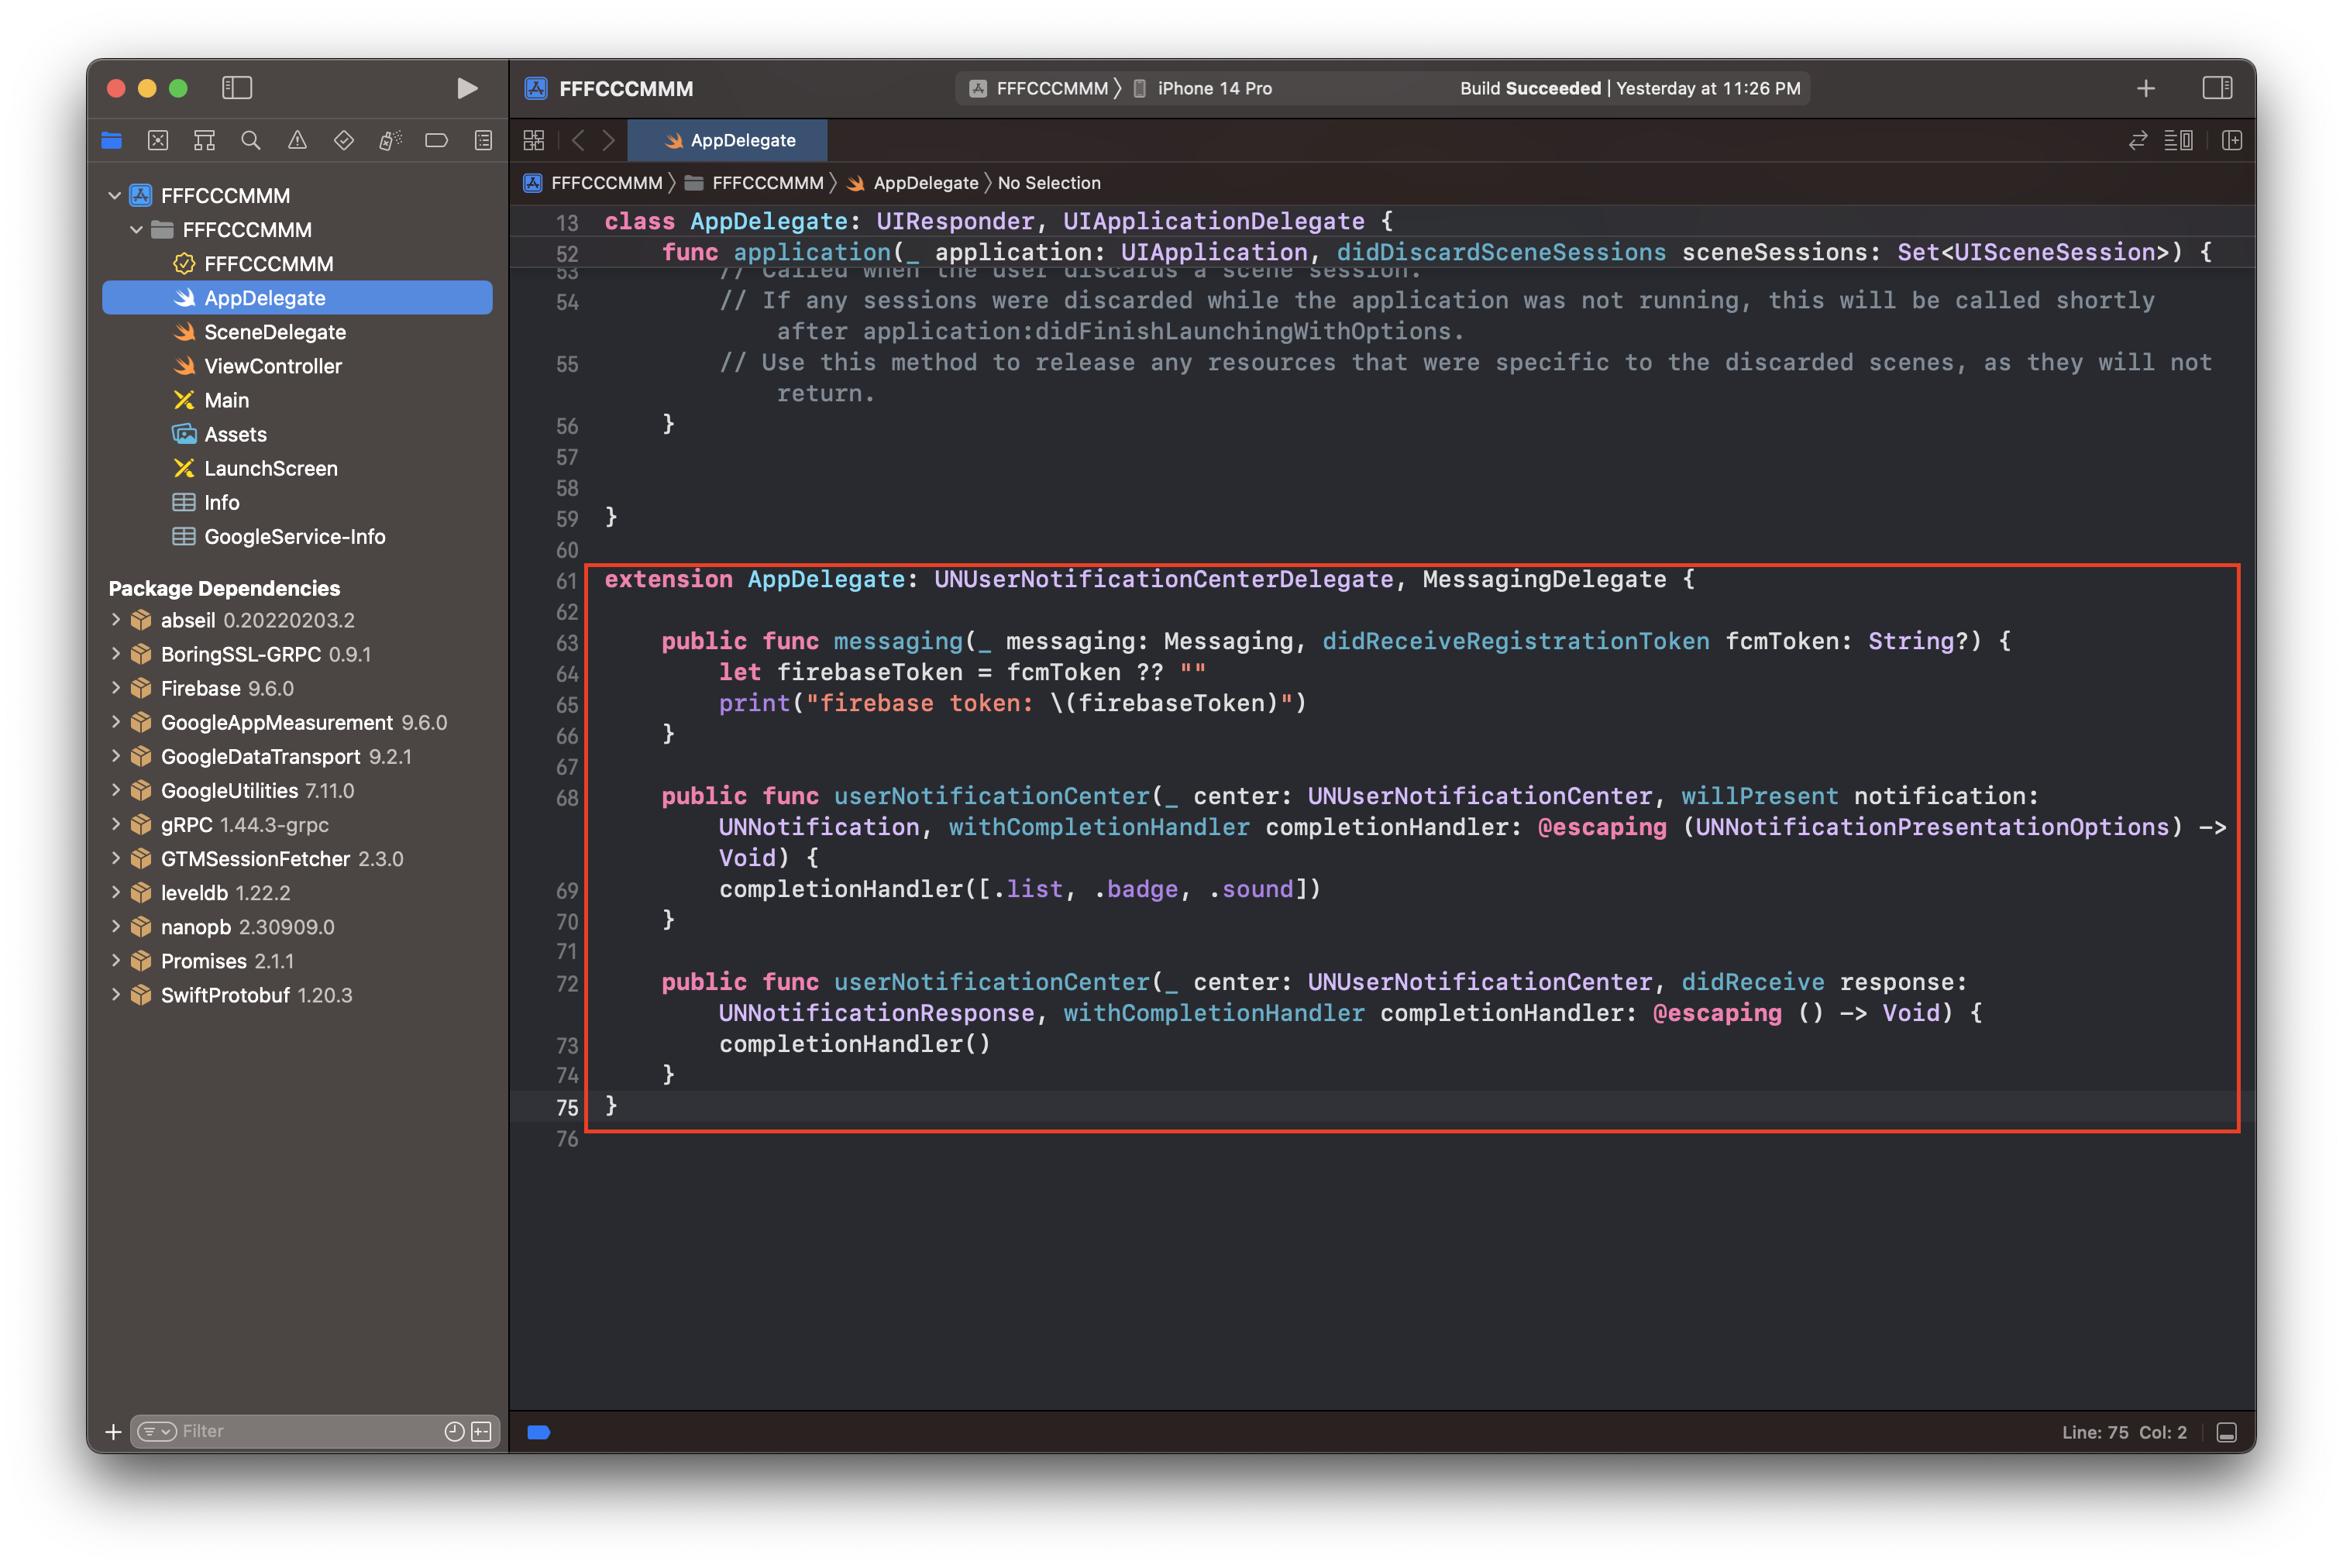
extension AppDelegate: UNUserNotificationCenterDelegate, MessagingDelegate {
    public func messaging(_ messaging: Messaging, didReceiveRegistrationToken fcmToken: String?) {
        let firebaseToken = fcmToken ?? ""
        print("firebase token: \(firebaseToken)")
    }

    public func userNotificationCenter(_ center: UNUserNotificationCenter, willPresent notification: UNNotification, withCompletionHandler completionHandler: @escaping (UNNotificationPresentationOptions) -> Void) {
    	completionHandler([.list, .badge, .sound])
    }

    public func userNotificationCenter(_ center: UNUserNotificationCenter, didReceive response: UNNotificationResponse, withCompletionHandler completionHandler: @escaping () -> Void) {
    	completionHandler()
    }
}
extesion 추가
이제 테스트 코드도 완료했습니다.
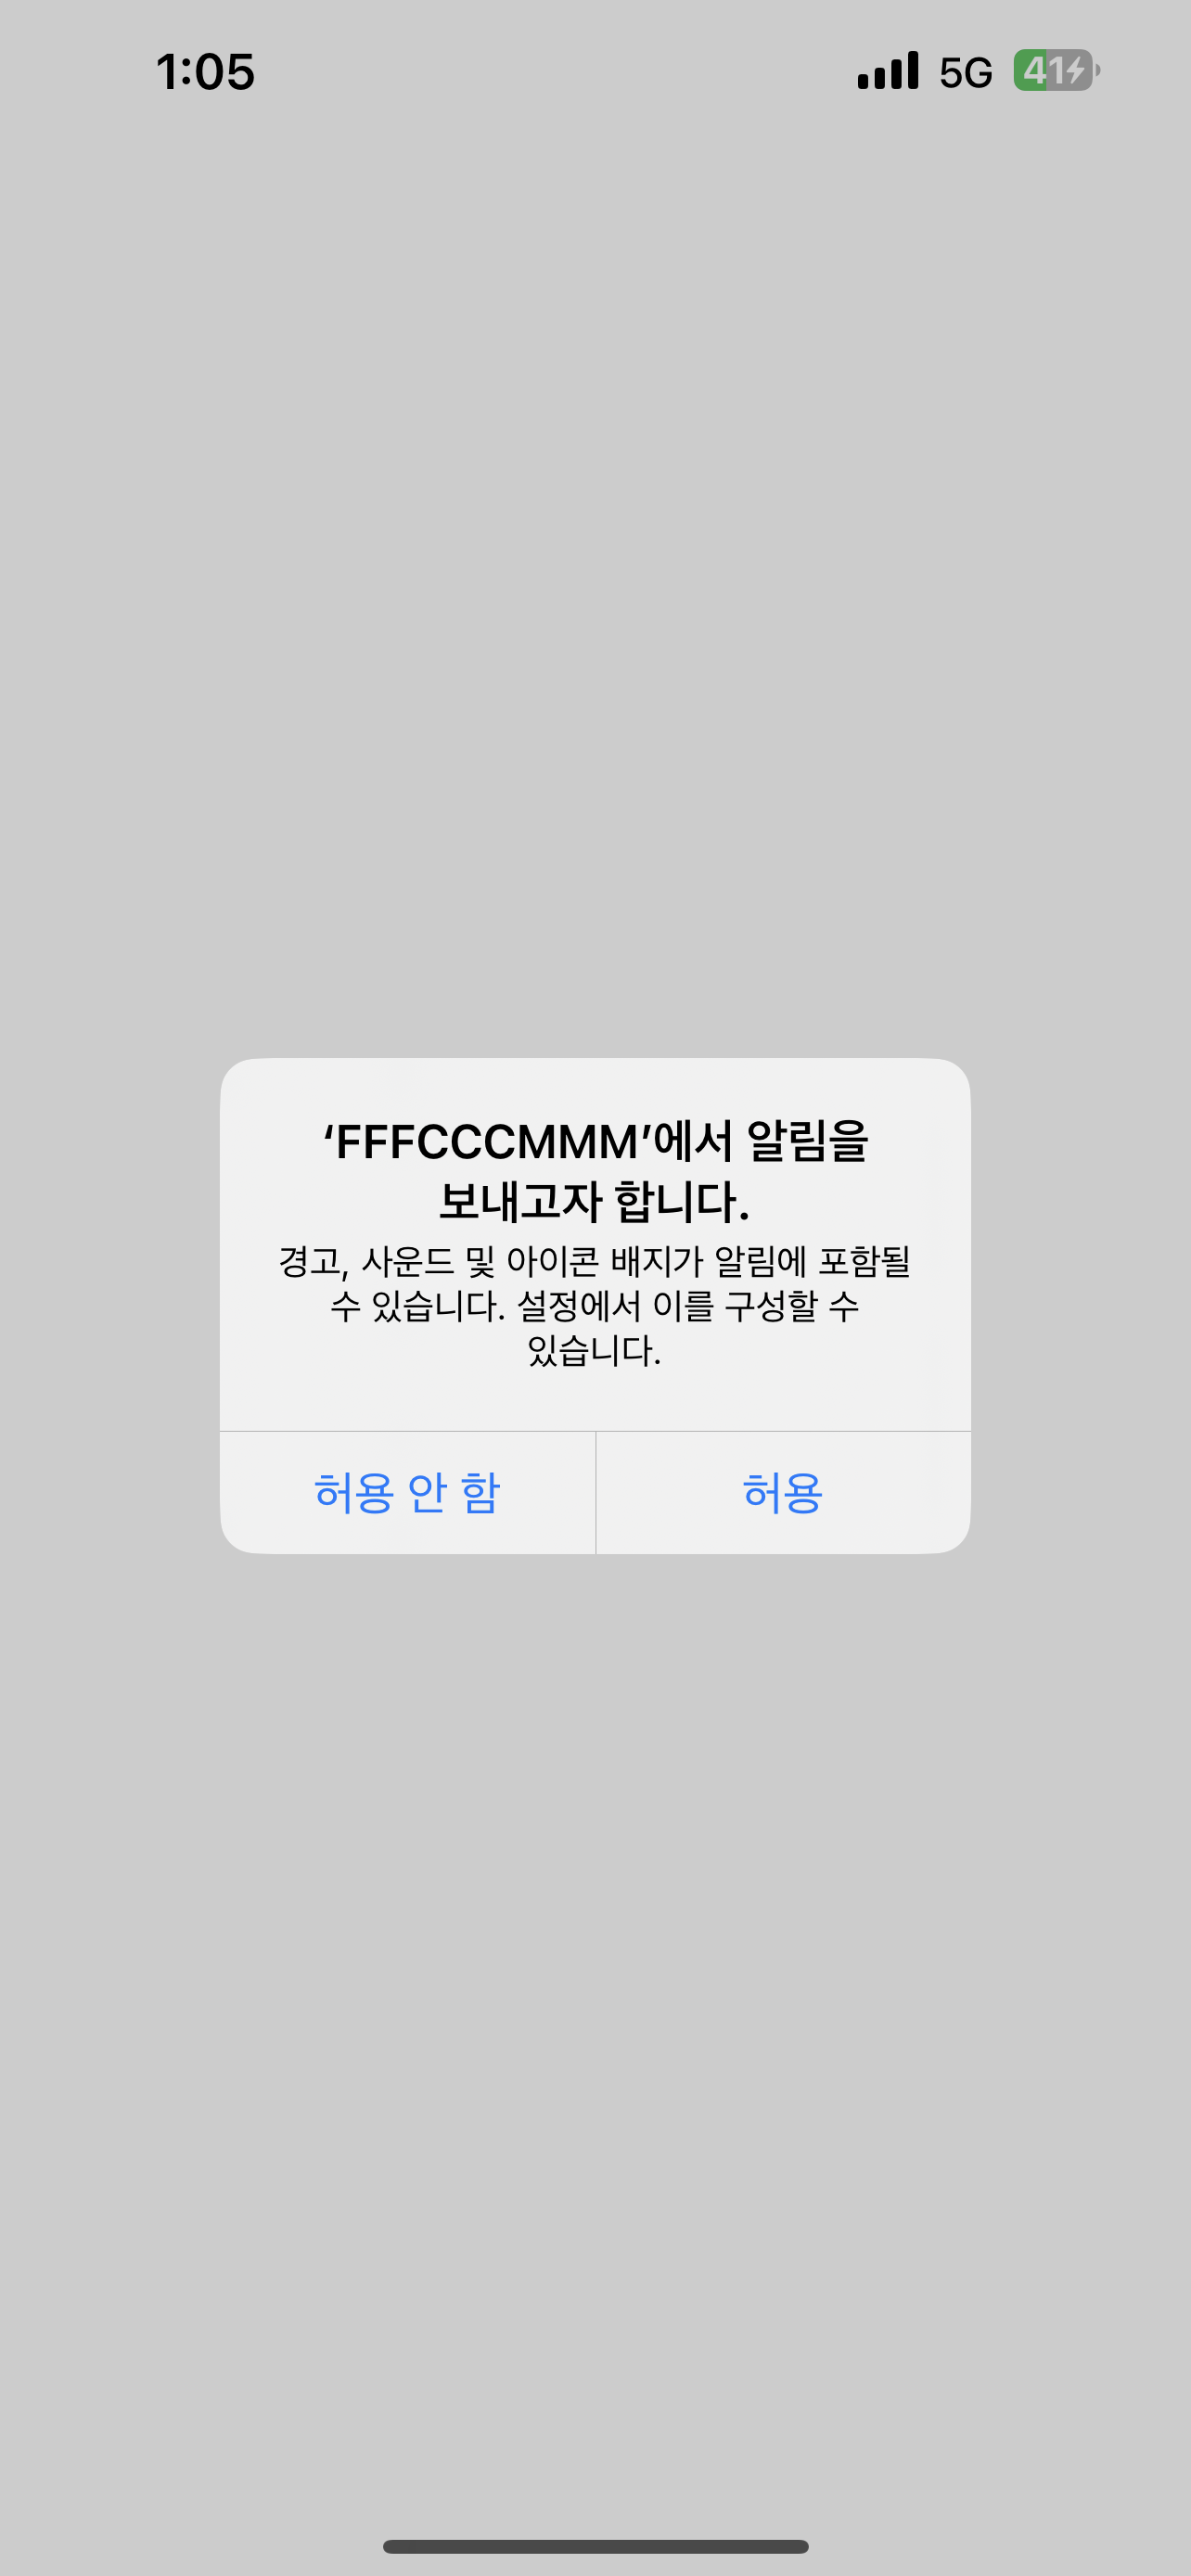
어플을 실행하면 알림 권한을 요청하는 메시지를 확인할 수 있습니다.
다음은 콘솔창에서 메세지를 전송해 기기에 받는 테스트를 진행하겠습니다.


